How To Add A DKIM Record (V=DKIM1) In 5 Simple Steps

Quick Answer
To add a DKIM record (v=DKIM1), generate a DKIM key pair, obtain the selector, create a DNS TXT record, publish the public key, and verify the configuration. Proper DKIM setup helps authenticate outgoing emails, prevent spoofing, improve email deliverability, and strengthen domain security.

DomainKeys Identified Mail (DKIM) is a critical email authentication protocol that helps protect your domain from spoofing, phishing attacks, and unauthorized email use. When setting up DKIM, you may come across the term “vdkim1,” which commonly refers to a DKIM DNS TXT record that begins with the required version tag v=DKIM1. Correctly publishing this record allows receiving mail servers to verify the authenticity and integrity of your emails using cryptographic signatures.
In this guide, we’ll walk through five simple steps to add a DKIM record the right way—from understanding the DKIM version tag and generating the correct public key to publishing, validating, and monitoring your record. Following these steps will help improve email deliverability, strengthen domain security, and ensure your DKIM configuration works as intended.
Step 1 - Confirm What v=DKIM1 Means for Your DKIM Setup
Before creating a DKIM record, clarify one important point: the correct DKIM version tag is v=DKIM1, not literally “vdkim1.” People often use the term “vdkim1 DKIM record” when referring to a DKIM DNS TXT record whose value begins with v=DKIM1. That distinction matters because DKIM, defined in RFC 6376, depends on precise syntax.
A DKIM record is part of the email authentication process. It allows a receiving email server, such as Gmail, to confirm that a signed message was authorized by the sending domain and was not altered in transit. The sending email server adds a DKIM signature to the message, including a selector, domain, and digital signature. The receiving server then performs a DNS lookup to find the public key associated with that selector and domain.
Understand the v=DKIM1 Version Tag
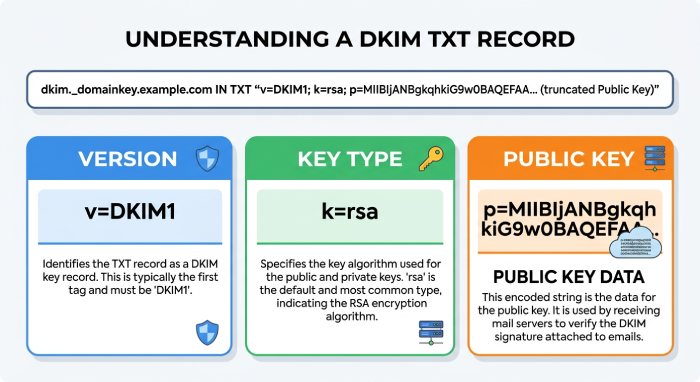
The v=DKIM1 tag identifies the DNS TXT record as a DKIM record. It typically appears at the beginning of the record value, followed by tags such as k=rsa and p= for the public key.
A typical DKIM record looks like this:
v=DKIM1; k=rsa; p=MIIBIjANBgkqh…The v=DKIM1 tag tells the receiving server that the TXT record contains DKIM information. The p=tag contains the public key, while the corresponding private key remains securely stored on the email server or with the email service provider.
Why a Typo Matters
If you accidentally publish “vdkim1” instead of “v=DKIM1,” DKIM authentication can fail. DKIM parsers expect standardized syntax, and even a small formatting error can prevent receiving servers from validating messages correctly.
Authentication failures can negatively impact email deliverability, increase the likelihood of messages being filtered as spam, and weaken protection against phishing and domain spoofing attacks.
Step 2 - Generate or Locate the Correct DKIM Public Key
Next, generate or obtain the correct public key for your DKIM configuration. In most hosted email environments, the email service provider automatically generates the DKIM key pair and provides the DNS record details required for setup.
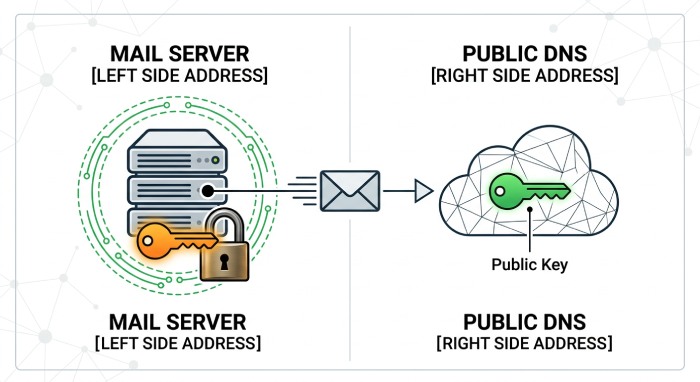
The public key belongs in DNS, while the private key remains confidential. The sending email server uses the private key to create a digital signature, and receiving servers use the public key to validate that signature.
Choose the Right Selector and Key Source
The selector is a label that identifies which DKIM key should be used during verification. It appears in the DKIM signature as the s= value, while the domain appears as the d= value.
For example:
s=mail2024; d=example.comThe receiving server will look up the public key at:
mail2024._domainkey.example.comThe _domainkey namespace is reserved specifically for DKIM records. The complete DNS record name combines the selector, _domainkey, and the domain name.
Protect the Private Key
Only the public key should be published in DNS. The private key must remain secure. If the private key is compromised, attackers may be able to sign fraudulent emails on behalf of your domain.
Many modern email platforms use RSA-SHA256 signatures. During the signing process, the email server generates a cryptographic hash of selected message headers and content, signs it with the private key, and includes the resulting signature in the email header. The receiving server then verifies the signature using the public key stored in DNS.
Step 3 - Create the DKIM TXT Record in Your DNS Zone
Once you have the selector and public key, create the DKIM record in your DNS zone. DNS stores many types of records for your domain, including MX records, CNAME records, SPF records, DMARC records, and DKIM TXT records.
In your DNS management console, select TXT as the record type. The host field should contain the selector and _domainkey, while the value field should contain the DKIM record beginning with v=DKIM1.
Example DKIM Record
| Field | Example |
|---|---|
| Record Type | TXT |
| Name | mail2024._domainkey |
| Value | v=DKIM1; k=rsa; p=MIIBIjANBgkqh… |
| TTL | 3600 |
Some DNS providers automatically append the domain name, while others require the full hostname.
The Time-To-Live(TTL) value controls how long DNS resolvers cache the record. A shorter TTL can be useful during testing, while a longer TTL is generally appropriate once the record is confirmed to be working correctly.
Some email providers use CNAME-based DKIM configurations rather than direct TXT records. In those cases, follow the provider’s instructions carefully to avoid DNS conflicts.
Step 4 - Check the Record Syntax Before Publishing
Before publishing, carefully review the DKIM record syntax.
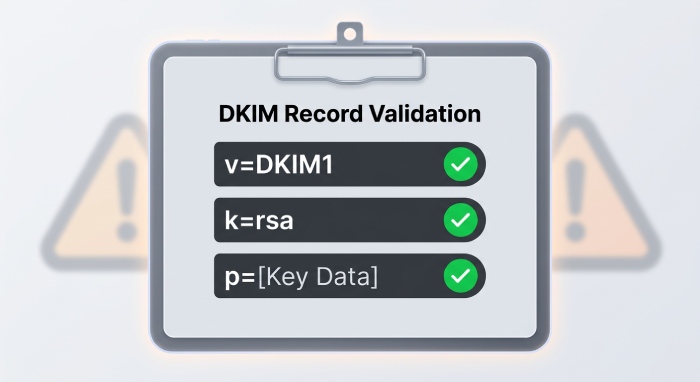
A valid DKIM record typically includes:
v=DKIM1— DKIM version tagk=rsa— key typep=— public key- Optional tags such as
t=for testing
Validate Tags and DNS Formatting
The public key can be very long, and some DNS management interfaces may visually wrap the text. This is usually normal as long as the actual TXT record remains intact
 Common issues that can cause DKIM failures include
- Missing semicolons
- Extra quotation marks
- Truncated public keys
- Incorrect selector names
- Copy-and-paste formatting errors
You can verify the record using DNS lookup tools such as:
dig TXT mail2024._domainkey.example.comThe response should return the DKIM record containing v=DKIM1 and the complete public key.
The selector used in the DKIM signature must match the selector used in DNS. If they do not match, receiving servers will be unable to locate the correct public key, causing authentication failures.
It is also important to remember that DKIM works alongside SPF and DMARC. SPF authorizes sending servers, while DMARC defines how receiving systems should handle authentication failures. Together, these technologies provide a strong foundation for email security.
Step 5 - Verify DKIM Authentication and Monitor Results
After publishing the DKIM record, send a test message from your domain to an external mailbox such as Gmail and inspect the message headers.
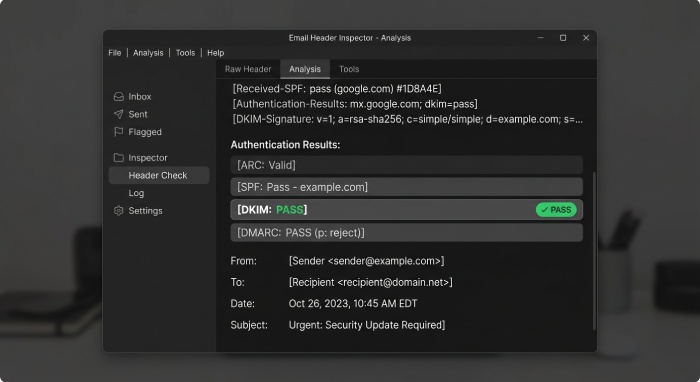 You should see a DKIM signature and an authentication result similar to:
 dkim=pass
A successful result indicates that the receiving server found the DKIM record, retrieved the public key, and successfully validated the signature.
This confirms that:
- The message was authorized by the sending domain.
- The message was not altered during transit.
- The DKIM configuration is functioning correctly.
Troubleshooting DKIM Failures
If DKIM validation fails, verify the following:
- The selector in the DKIM signature matches the published selector.
- The domain in the DKIM signature matches the domain in DNS.
- The TXT record begins with
v=DKIM1. - The public key is complete and properly formatted.
- The sending server is using the correct private key.
- DNS propagation is complete.
- DKIM signing is enabled on the email platform.
You should also review DMARC aggregate reports to monitor DKIM performance across different receiving systems.
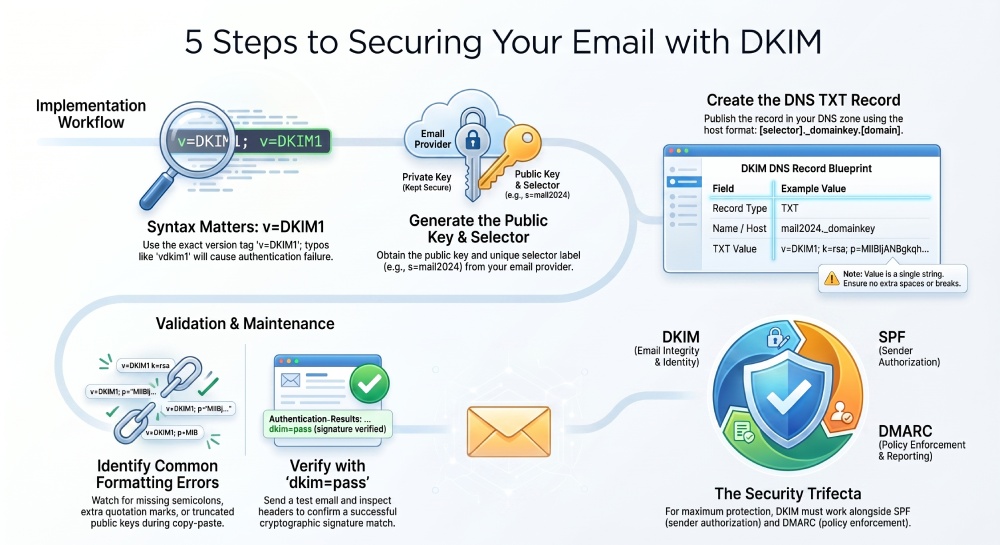 A properly configured DKIM record is essential for protecting your domain against spoofing, phishing, and email impersonation attacks. By publishing a valid
 v=DKIM1 record, using the correct selector, and verifying authentication results, you can improve email deliverability and strengthen trust with receiving mail servers.
When combined with SPF and DMARC, DKIM becomes a critical component of a modern email security strategy, helping organizations protect their domains, maintain sender reputation, and ensure legitimate messages reach their intended recipients.
General Manager
General Manager at DuoCircle. Product strategy and commercial lead across the email security portfolio.
Secure your email infrastructure
Protect, authenticate, and deliver. Contact our team to find the right solution.