How To Perform An Email Blacklist Check Before Sending Large Campaigns

Quick Answer
Before sending a large email campaign, perform an email blacklist check to ensure your domain or IP isn't listed on spam databases. Use trusted blacklist lookup tools, fix authentication issues (SPF, DKIM, DMARC), and resolve listings to improve deliverability and protect your sender reputation.
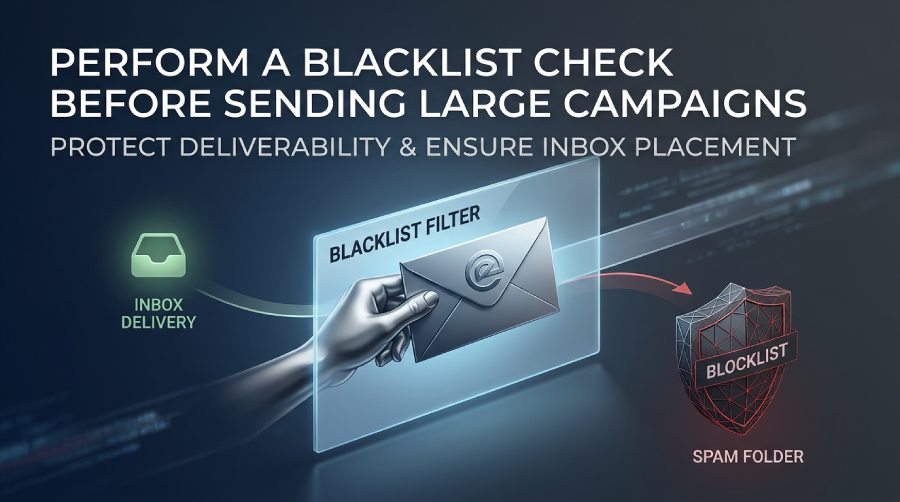
Email marketing remains one of the most effective ways to engage customers, generate leads, and drive sales. However, even the most well-crafted email campaign can fail if your sending domain or IP address has been blacklisted. Before launching a large email campaign, performing an email blacklist check is a critical step that helps ensure your messages reach subscribers’ inboxes instead of being blocked or filtered as spam.
An email blacklist check allows you to identify whether your domain or mail server IP appears on one or more email blocklists used by Internet Service Providers (ISPs), spam filters, and email security providers. Detecting and resolving blacklist issues before sending thousands of emails can protect your sender reputation, improve deliverability, and prevent costly campaign failures.
In this guide, you’ll learn what email blacklists are, why checking them matters, and the exact steps to perform an effective email blacklist check before every large email campaign.
What an Email Blacklist Is and Why It Matters Before High-Volume Sending
An email blacklist check is the process of checking whether your sending IP address, domain, or mail infrastructure appears in a blacklist database used by mailbox providers and security systems. These databases help identify sources of unwanted email, phishing, malware, or suspicious sending behavior.
Before launching a bulk email campaign, checking your blacklist status is essential because major providers such as Google and Microsoft use reputation signals to decide whether messages reach the inbox, land in the spam folder, or get rejected entirely.
How Blacklists Affect Email Deliverability
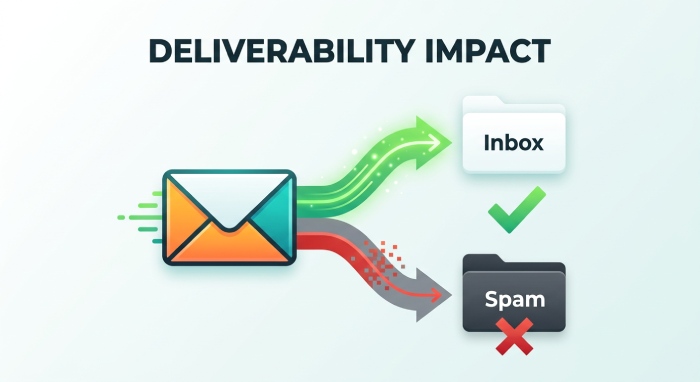
Email blacklists, also called blocklists, directly influence email deliverability. If your domain or IP appears on a major IP blacklist or domain blacklist, a recipient’s spam filter may block your campaign before it ever reaches the user.
A poor sender reputation can cause:
- Lower inbox placement
- Higher bounce rates
- More aggressive spam detection
- Delays in email delivery
- Rejection by a mail provider
- Damage to long-term email trust
DNSBL and RBL Explained
A DNSBL, or DNS-based blacklist, is a blacklist queried through the Domain Name System. An RBL, or real-time blacklist, works similarly by allowing receiving systems to query a database in real time during message acceptance.
When a receiving mail server gets an incoming email, it may perform a blocklist query against a DNSBL or RBL. If the sending IP has a negative listed status, the server may reject the message or route it to a spam filter.
Why Sender Reputation Is Checked in Real Time
Mailbox providers rely on reputation signals because spam campaigns move quickly. A real-time blacklist helps them identify active spam activity, compromised infrastructure, and repeat offenders before users are exposed to risk.
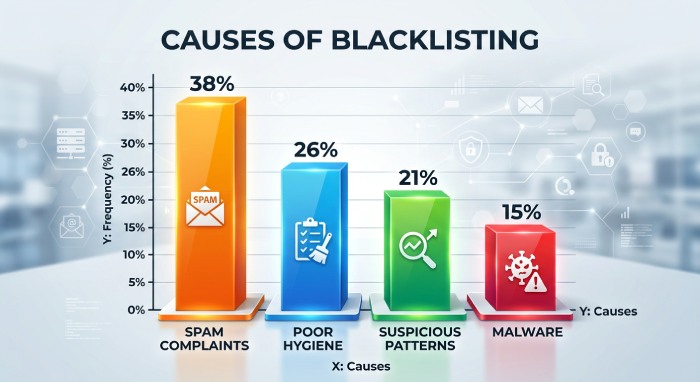
Common Causes of Blacklisting, Including Spam Complaints, Poor List Hygiene, and Suspicious Sending Patterns
Most blacklist issues are not random. They usually reflect patterns that make your sending behavior look risky to a spam filter, RBL, or blacklist database.
Spam Complaints and Spam Reports
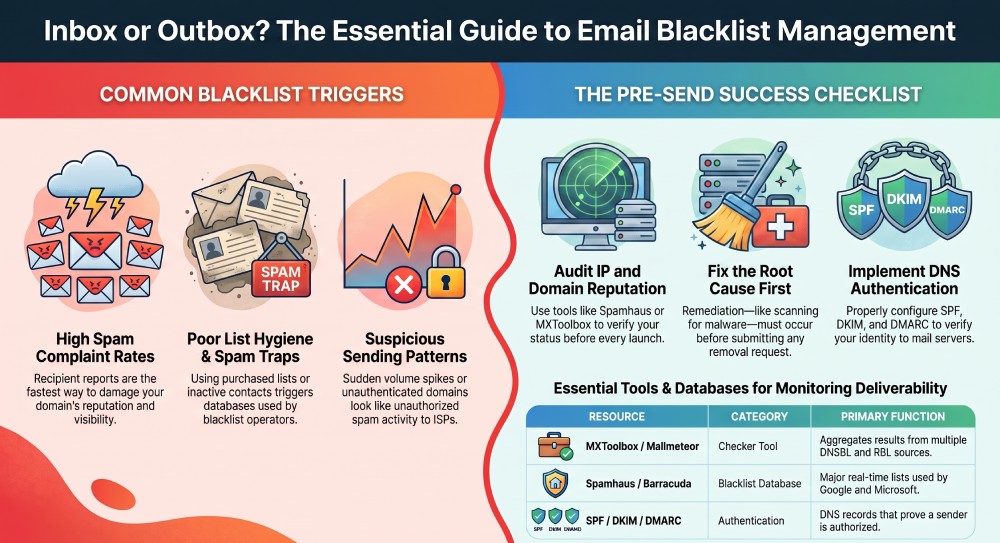
High complaint rates are one of the fastest ways to damage sender reputation. If recipients mark your campaign as spam, those spam reports may be shared with a reputation database or used by mailbox providers to downgrade your domain reputation.
Too many complaints can place your domain on a domain blacklist or your sending infrastructure on an IP blacklist.
Poor List Hygiene and Spam Traps
Sending to outdated, purchased, or scraped contacts increases the risk of hitting a spam trap. Spam traps are email addresses used by blacklist operators to identify senders that do not maintain permission-based lists.
An email address check before sending can help remove invalid, inactive, or risky contacts. Clean lists protect email deliverability and reduce the chance of a negative blacklist status.
Why Purchased Lists Are Dangerous
Purchased lists often include inactive contacts, recycled spam traps, and people who never opted in. Sending to them can trigger a DNSBL, RBL, or spam database entry quickly.
Suspicious Sending Patterns
A sudden spike in volume, inconsistent sending cadence, or sending from a new domain without warming it up can look suspicious. This is especially true for new senders with limited IP reputation or weak sender reputation.
Other risky patterns include:
- Sending from a poorly configured mail server
- Using a domain with weak authentication
- Mailing many invalid addresses
- Repeatedly sending similar content
- Using URL shorteners or suspicious links
Shared Hosting, VPN, Proxy, and Cloud Risks
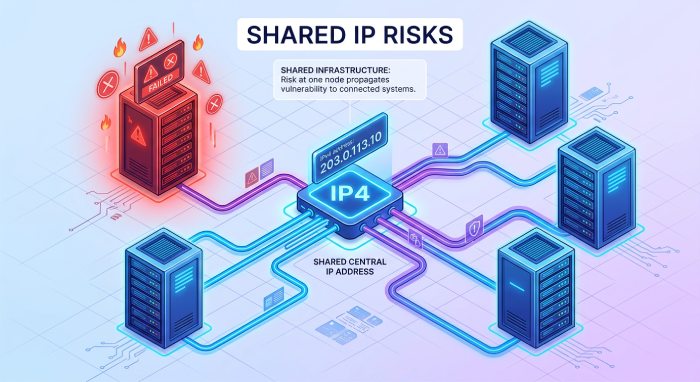
If you send email from Shared Hosting, a VPN (virtual private network), Proxy, or some unmanaged Cloud environments, your IP may be affected by other users. In shared hosting, one abusive neighbor can land the entire server range on an IP blacklist.
Security Problems That Trigger Blacklisting
A compromised server, open relay, or malware-infected account can send spam without your knowledge. Blacklist operators often list these sources to protect recipients and improve email security.
Malware and Unauthorized Sending
If malware hijacks an account or script, your system may begin sending unwanted email automatically. That behavior can quickly create a bad blacklist status across multiple DNSBL and RBL services.
How to Check Your IP Address and Domain Against Major Email Blacklists
A proper email blacklist check should include both an IP blacklist review and a domain blacklist review. Checking only one side can miss issues that still affect email deliverability.
Step 1: Identify Your Sending IP and Domain
Start by identifying the exact IP address your campaign will use. This may be the IP of your SMTP provider, dedicated sending server, or marketing automation platform.
Also check your sending domain, tracking domain, bounce domain, and any linked URLs. A domain blacklist may affect campaign performance even if your sending IP is clean.
Use MX Lookup and DNS Records
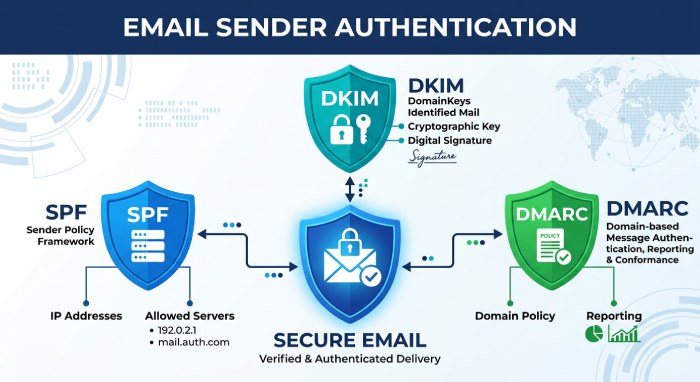
An MX lookup can help confirm which servers handle mail for your domain. You may also need to inspect authentication records such as SPF, DKIM, and DMARC. In DNS tools, these are commonly checked by DNS record type, such as TXT, MX, A, or CNAME.
Step 2: Use a Blacklist Checker Tool
Use a reputable blacklist checker tool to check blacklists across multiple providers. Popular options include:
- MXToolbox at tools.mxtoolbox.com
- Spamhaus at check.spamhaus.org
- DNSChecker
- CleanTalk
- Mailmeteor at mailmeteor.com
- Abusix
These tools query multiple DNSBL and RBL sources and show whether your domain or IP has a problematic listed status.
Step 3: Check Major Blacklist Databases
When performing an email blacklist check, review results from major services such as Spamhaus, Barracuda, Spamcop, SORBS, URIBL, Abusix, and CleanTalk. You may also see niche or regional blocklists such as 0Spam Project, Calivent, EFNet Tor, Fabel, Konstant, Korumail, NordSpam, RedHawk, Swinog, Woody’s, and ZapBL.
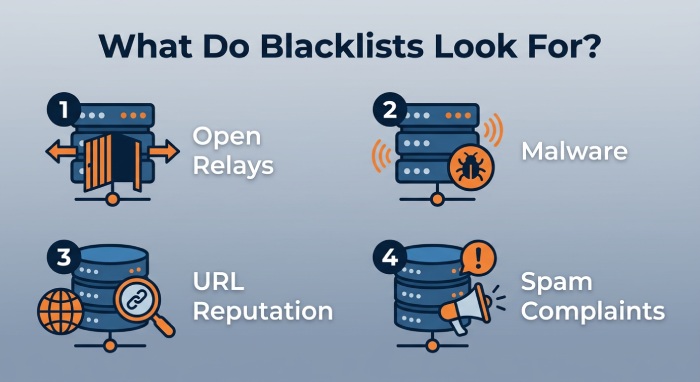
Each blacklist database has its own listing criteria. Some focus on open relays, some on malware, some on URL reputation, and others on direct spam complaints.
IP Blacklist vs. Domain Blacklist Results
An IP blacklist result means the sending IP has been flagged. A domain blacklist result means the domain, URL, or hostname has been associated with abuse or suspicious content. Both can harm sender reputation, but the fix may differ. An IP issue may require server cleanup or provider action, while a domain issue may require list hygiene, authentication fixes, or content review.
Interpreting Blacklist Status
Do not panic if you see one minor listing, but do investigate. A serious blacklist status on a major Domain Name System Blacklist(DNSBL) or RBL can significantly reduce email deliverability. Compare results across tools and confirm whether the listing is active, historical, or informational.
What to Do If You Find Your Sender Reputation, Domain, or IP on a Blacklist
If your email blacklist check reveals a listing, avoid sending a large campaign until you understand the cause. Continuing to send while listed can worsen sender reputation and make blacklist removal harder.
Confirm the Listing and Identify the Cause
First, confirm whether the listing applies to your sending IP, domain, tracking domain, or linked URL. Then investigate recent behavior:
- Did complaint rates increase?
- Did you import a new list?
- Was there a spike in bounces?
- Did a server get compromised?
- Were there signs of spam activity?
- Did an account send unauthorized mail?
A clear root cause is essential before contacting a blocklist operator.
Clean Up Before Requesting Delisting
Most blacklist operators expect remediation before they will delist you. Fix the issue first, then submit a removal request.
Recommended cleanup steps include:
- Remove invalid and unengaged contacts
- Pause risky segments
- Fix SPF, DKIM, and DMARC
- Scan for malware
- Close any open relay
- Secure compromised accounts
- Review campaign content for spam-like elements
- Confirm unsubscribe links work properly
How to Submit a Removal Request
Visit the blacklist’s official lookup page and follow its instructions. For example, use check.spamhaus.org for Spamhaus listings or the official lookup portals for Barracuda, Spamcop, SORBS, or Abusix.
Your removal request should be factual and concise. Explain what caused the listing, what you corrected, and how you will prevent recurrence. Avoid blaming the blacklist database or submitting repeated requests before fixing the problem.
Coordinate with Your Email Service Provider
If the issue is tied to a shared platform, contact your email service provider(ESP) or mail provider. They may control the sending IP and have direct relationships with blacklist operators. If you use dedicated infrastructure, your team is responsible for improving IP reputation and maintaining blocklist monitoring.
Best Practices to Prevent Future Blacklisting Before Launching Large Email Campaigns
Prevention is much easier than emergency blacklist removal. A proactive email blacklist check should be part of every pre-send checklist for high-volume campaigns.
Maintain Strong List Hygiene
Only send to people who opted in. Remove hard bounces immediately, suppress complainers, and regularly sunset inactive subscribers. This protects domain reputation, reduces spam complaints, and helps avoid spam trap hits.
Warm Up Sending Volume Gradually
Do not go from zero to hundreds of thousands of emails overnight. Gradual sending helps mailbox providers evaluate your sender reputation safely. This is especially important when using a new domain, new IP, or new mail server.
Monitor Engagement Signals
Track opens, clicks, replies, unsubscribes, bounces, and complaints. Poor engagement tells a spam filter that users do not want your email, which can increase the risk of a poor blacklist status.
Authenticate and Secure Your Email Infrastructure
Configure SPF, DKIM, and DMARC correctly. Keep servers patched, disable unauthorized relaying, monitor scripts, and enforce strong passwords. Good security practices reduce the chance of a compromised server or malware incident.
Run Blacklist Monitoring Before Every Major Send
Use blocklist monitoring and scheduled tools to check blacklists before, during, and after large campaigns. Review both IP blacklist and domain blacklist results, confirm your blacklist status, and resolve any listing before sending.
Build a Repeatable Pre-Send Checklist
A reliable campaign checklist should include:
- Confirm list permission and hygiene
- Run an email address check
- Validate DNS authentication
- Review links and content
- Perform an email blacklist check
- Check IP and domain reputation
- Review DNSBL and RBL results
- Confirm no active listing in a major blacklist database
- Monitor post-send complaints and bounces
By making an email blacklist a standard part of your workflow, you protect email deliverability, preserve sender reputation, and reduce the chance that future campaigns will be blocked by a spam filter, DNSBL, RBL, IP blacklist, or domain blacklist.
General Manager
General Manager at DuoCircle. Product strategy and commercial lead across the email security portfolio.
Secure your email infrastructure
Protect, authenticate, and deliver. Contact our team to find the right solution.