How to Set Up SPF and DKIM for Campaign Monitor

Quick Answer
To authenticate Campaign Monitor emails, configure DKIM for your sending domain by adding the DNS record provided by Campaign Monitor. SPF alone may not align with your From domain, so aligned DKIM is important for DMARC compliance and email deliverability.
Email authentication is an important part of maintaining strong email security and improving the chances of your marketing messages reaching recipients’ inboxes. If your organization uses Campaign Monitor to send newsletters or promotional emails, you should understand how SPF, DKIM, and DMARC interact with your sending domain.
Campaign Monitor sends email on behalf of its customers, which means your domain needs to be properly authenticated. While SPF configuration has limitations with this particular email service, DKIM can be configured to authenticate your domain and support DMARC compliance.
This guide explains how Campaign Monitor email authentication works and walks through the process of setting up DKIM for your sending domain.
Understanding SPF When Using Campaign Monitor
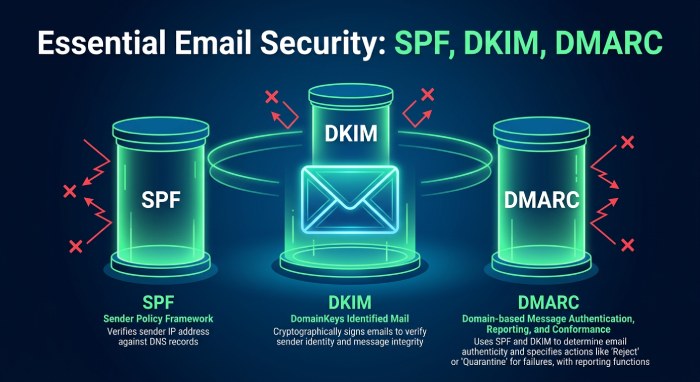
Sender Policy Framework, commonly known as SPF, is an email authentication method that identifies which servers are permitted to send messages for a domain.
When a receiving mail server receives an email, it can check the domain’s SPF record to determine whether the sending server has authorization. This process can help reduce unauthorized use of a domain and contribute to better email authentication.
However, SPF works differently with some third-party email platforms, including Campaign Monitor.
Why SPF Alignment May Not Work With Campaign Monitor
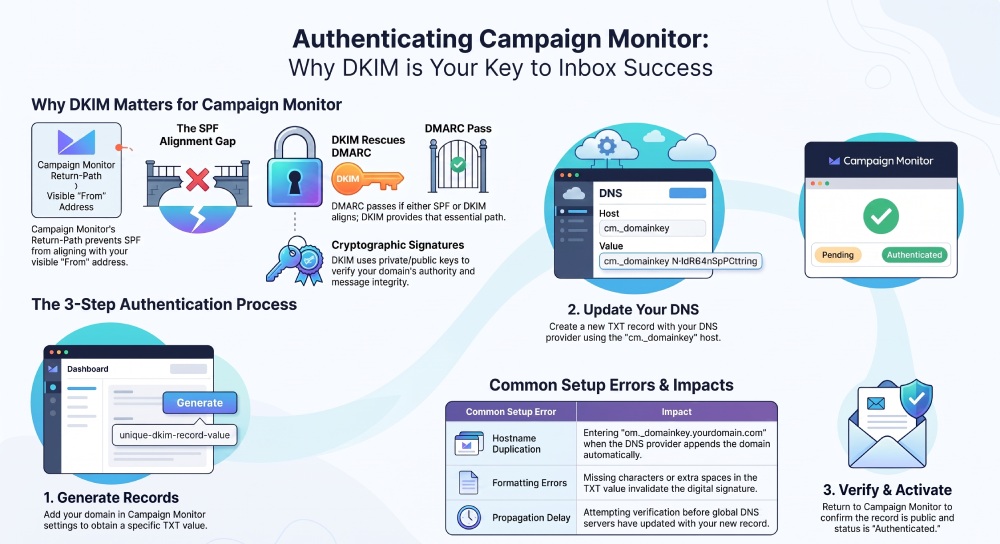
Campaign Monitor uses its own Return-Path domain for emails sent through its platform. As a result, the domain authenticated by SPF may differ from the domain shown in the visible From address. When these domains do not align, SPF authentication alone will not satisfy DMARC alignment.
For DMARC to pass through SPF, both SPF authentication and domain alignment are required. Even if Campaign Monitor’s sending infrastructure is included in your SPF record, SPF alignment may still not be achieved.
Some users may consider adding the following mechanism to their SPF record:
include:_spf.createsend.comFor example, an SPF record could contain several authorized email services:
v=spf1 include:example-mail-service.com include:another-service.com include:_spf.createsend.com ~allAlthough this may authorize certain Campaign Monitor infrastructure for SPF purposes, it does not necessarily provide DMARC alignment for messages sent through the platform.
It can also add another DNS lookup to your SPF configuration. Since SPF records have a limit on DNS lookups, organizations should avoid adding unnecessary mechanisms.
The important point is that Campaign Monitor users can still support DMARC authentication by configuring DKIM correctly.
How DKIM Supports Campaign Monitor Email Authentication
DomainKeys Identified Mail, or DKIM, uses cryptographic signatures to help verify the authenticity and integrity of email messages.
When an email is sent, the sending system applies a digital signature to the message. The receiving server can then use information published in DNS to validate that signature.
A DKIM implementation involves two related keys:
- Private key: Used by the sending platform to create the DKIM signature.
- Public key: Published in DNS and used by receiving mail servers to verify the signature.
When you use an external email service provider, the platform typically manages the private key. Your responsibility is generally to publish the DKIM information supplied by the provider in your domain’s DNS settings.
A successful DKIM check helps demonstrate that the message was authorized by the signing domain and that protected portions of the message have not been altered during delivery.
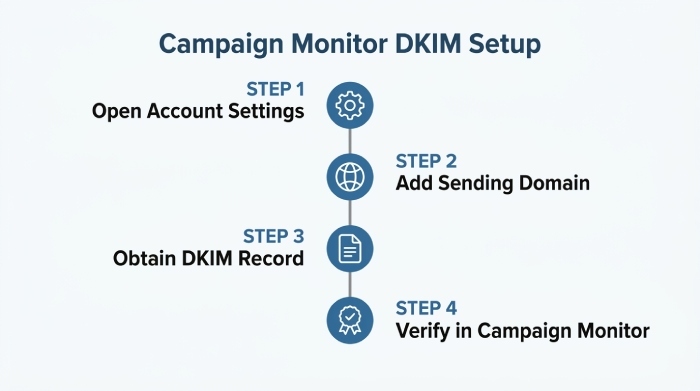
Setting Up DKIM for Campaign Monitor
Campaign Monitor allows users to authenticate their sending domains by adding the required DNS record.
Follow the steps below to begin the setup process.
Step 1: Open Your Account Settings
Sign in to your Campaign Monitor account.
Locate your profile or account menu and open the account settings section. This is where you can manage settings related to your organization and sending configuration.
Step 2: Go to Your Sending Domain Settings
Find the section for managing sending domains.
This area allows you to view domains that are already configured and add new domains that you want to use for authenticated email campaigns.
Step 3: Add a New Sending Domain
Select the option to add a domain.
You will need to enter the domain name that you use in the From addresses for your email campaigns.
Make sure you enter the correct domain. For example, if your marketing emails are sent from addresses using yourcompany.com, that domain should be added to the sending domain configuration.
Step 4: Obtain the DKIM DNS Record
After submitting your domain, Campaign Monitor will provide DNS information that must be published before authentication can be completed.
The platform will usually provide details such as:
- The DNS record type
- The host or name
- The required TXT value
Copy this information carefully. Even a small error in the DNS record can prevent the authentication process from completing successfully.
Adding the Campaign Monitor DKIM Record to DNS
The next part of the process takes place with your DNS hosting provider.
Step 1: Create a New DNS Record
Log in to the service where your domain’s DNS records are managed.
Create a new record and select TXT as the record type.
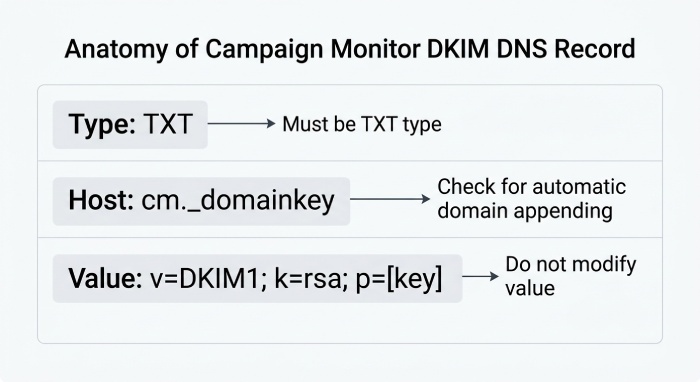
Step 2: Enter the DKIM Host Name
Campaign Monitor will provide the name or host required for the DKIM record.
Depending on your DNS provider, you may need to enter:
cm._domainkey
or the complete domain-based version of the record name.
DNS management interfaces do not always handle host names in exactly the same way. Some automatically append your domain name, while others require the full hostname.
Review your DNS provider’s instructions if you are unsure which format should be used.
Step 3: Add the TXT Value
Copy the DKIM value provided by Campaign Monitor and paste it into the value or content field of your TXT record.
Do not modify the DKIM value unless your DNS provider specifically requires formatting adjustments.
Once the information has been entered, save the record.
Step 4: Wait for DNS Changes to Become Available
DNS updates may not appear everywhere immediately. The time required can vary depending on the DNS provider and existing record settings.
Before continuing, make sure the new TXT record is publicly available and contains the correct information.
Step 5: Complete Authentication in Campaign Monitor
Return to the Campaign Monitor domain authentication section.
Select the option to verify or authenticate the domain.
The system will check your DNS configuration and confirm whether the DKIM record has been published correctly.
After successful verification, the domain should show an authenticated status.
How DKIM Helps With DMARC
DMARC uses SPF and DKIM results to evaluate whether an email message is properly authenticated.
For a message to pass DMARC, either SPF or DKIM must pass and align with the domain used in the visible From address.
Because SPF alignment can be limited when Campaign Monitor controls the Return-Path domain, DKIM becomes particularly important.
When Campaign Monitor signs messages using a DKIM configuration that aligns with your sending domain, successful DKIM authentication can allow the message to satisfy DMARC requirements even when SPF alignment is unavailable.
This makes proper DKIM setup an essential part of securing email campaigns sent through the platform.
Common Issues During Campaign Monitor DKIM Setup
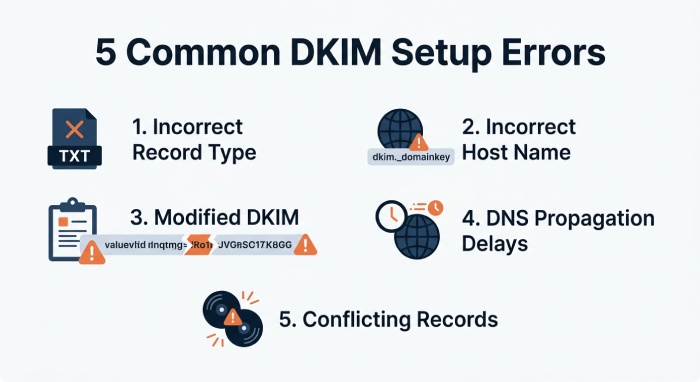
Although the setup process is relatively straightforward, several issues can delay authentication.
Incorrect Record Type
Make sure the record type matches the information provided by Campaign Monitor. Using a different DNS record type can cause the authentication check to fail.
Incorrect Host Name
A common problem occurs when the full hostname is entered into a DNS system that automatically adds the domain name.
This can create an incorrect record location. Always check how your DNS provider handles host names.
Missing or Modified DKIM Value
The DKIM value should be copied accurately.
Missing characters, extra spaces, or accidental changes can make the record invalid.
DNS Propagation Delays
A correctly configured record may not be detected immediately after it is published.
Allow sufficient time for the DNS update to become available before assuming there is a configuration error.
Multiple Conflicting Records
Review existing DNS records before adding new authentication settings. Conflicting or duplicate records can create unexpected authentication problems.
Best Practices for Campaign Monitor Email Authentication
Setting up DKIM is only one part of maintaining a secure and reliable email environment.
Consider the following practices:
- Review your SPF record regularly and keep it within SPF lookup limits.
- Enable DKIM for all legitimate third-party email services that send messages for your domain.
- Maintain a valid DMARC record for your domain.
- Monitor email authentication results to identify unauthorized senders.
- Keep track of all platforms that send email using your domain.
- Remove outdated services from your email authentication configuration when they are no longer in use.
Regular monitoring is especially important because organizations often add new marketing platforms, customer relationship tools, support systems, and other email services over time.
Final Thoughts
Campaign Monitor users should pay close attention to DKIM authentication when sending marketing campaigns from their own domains.
Because SPF authentication may not align with your visible From domain when using Campaign Monitor, simply adding an SPF include is not necessarily enough for DMARC to pass. Configuring DKIM with an aligned sending domain provides an alternative authentication path that can satisfy DMARC requirements.
The process involves adding your sending domain in Campaign Monitor, obtaining the required DKIM information, publishing the provided TXT record in DNS, and completing the authentication process through the platform.
Once your domain has been successfully authenticated, your Campaign Monitor emails will have stronger domain authentication support, helping improve trust in your legitimate email campaigns while contributing to a more secure email environment.
General Manager
General Manager at DuoCircle. Product strategy and commercial lead across the email security portfolio.
Secure your email infrastructure
Protect, authenticate, and deliver. Contact our team to find the right solution.