
Guide to DMARC setup for Google Workspace
Google Workspace helps businesses send emails every day, but keeping those emails safe is just as important as sending them. Gmail now strongly encourages domains to use DMARC, which tells mail servers how to treat suspicious messages. If you set it up correctly, your emails are more likely to reach inboxes and your brand stays protected.
When you enable DMARC for your Google Workspace, you get a way to instruct receiving servers what to do with emails that fail the DMARC checks. You can tell them to place such emails in the spam folder or reject them altogether, preventing email-based phishing incidents.
This short guide will show you how to publish a DMARC record for Google Workspace and check that it is working properly.
How to Create a DMARC Record
You can make your DMARC record using any online DMARC record generator. It will ask for your domain name, the policy you want (monitor, quarantine, or reject), and an email address for reports. The tool will then give you a ready TXT record.
Once your DMARC record is created, copy the result so you can add it to your DNS.

How to Add DMARC in DNS
To enable DMARC in Google Workspace, you need to publish the record in your DNS. Follow these steps:
- Log in to your DNS provider
- Create a new TXT record
- Use this name: _dmarc.yourdomain.com
- Paste the DMARC value
- Save it and wait for DNS to update
After you publish it, mail servers will start applying your policy to suspicious emails. You will also receive reports that show how your domain is used and whether your messages pass authentication.
DMARC policy options
DMARC has three policies that decide what happens when an email fails authentication.
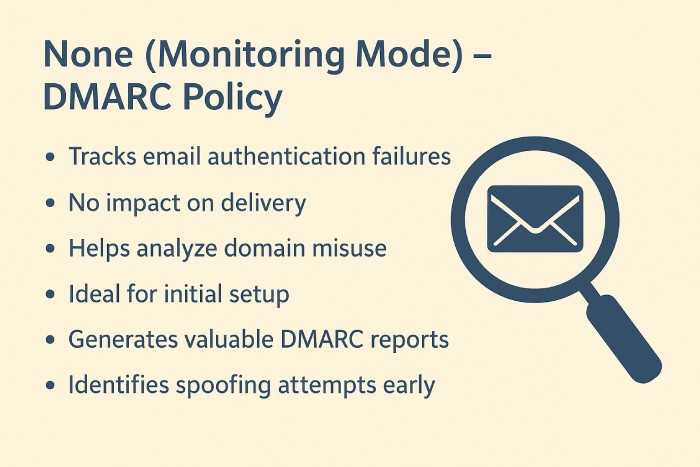
None (Monitoring Mode)
This is the beginner policy. When you choose “none,” you are only watching what is happening. Emails that fail DMARC are still delivered, but you get reports showing which ones passed and which ones failed. This is great for getting visibility without blocking anything. Most domain owners start here so they can understand their email sources.
Quarantine
This is the middle policy. When you switch to “quarantine,” mail servers will treat failed emails as suspicious. Instead of landing in the inbox, they may go to the spam or junk folder. This protects users because risky messages do not reach them directly. Quarantine is helpful when you already understand your email flow and want to add some level of control.
Reject
This is the strictest policy. When you choose “reject,” emails that fail DMARC are completely blocked. They never reach the inbox or spam folder. This gives your domain the strongest protection against spoofing and abuse. Most businesses move to “reject” only after fixing alignment issues and making sure only authorized systems send emails.
In short, DMARC strengthens your email security by starting with monitoring, then moving to warning, and finally full blocking. You begin with “none,” shift to “quarantine,” and reach “reject.” This gradual approach keeps your email safe without breaking your delivery. DMARC is most powerful when you increase policies step by step while watching your reports.