
In an age where our inboxes overflow with messages, ensuring email security is more important than ever. Picture this: you’re excited to receive a message from a colleague, only to find that it’s actually a phishing scam, crafted to look just like the real thing. This unsettling scenario underscores the significance of protecting your email domain. That’s where the Sender Policy Framework (SPF) comes in. By helping you define who is allowed to send emails on behalf of your domain, SPF acts as your first line of defense against email spoofing and phishing attempts. Understanding how to implement it effectively could save you from headaches down the road and keep your communications safe and sound. Let’s dive into what SPF is and why it deserves your attention.
An example of a Sender Policy Framework (SPF) record is: `v=spf1 ip4:192.0.2.0/24 include:_spf.example.com -all`. This indicates that emails can be sent from the specified IP address range (192.0.2.0/24) and any IPs defined by the included SPF record from another domain (_spf.example.com), while rejecting all other sources (-all).
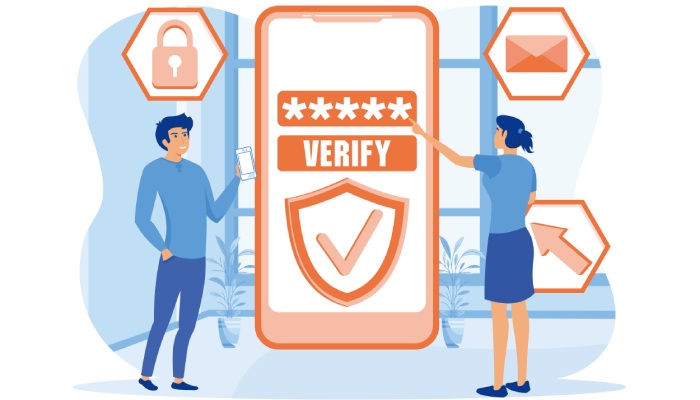
What is Sender Policy Framework (SPF)?

The Sender Policy Framework, commonly referred to as SPF, acts like a security badge for your email. It allows the owner of a domain to specify which mail servers are authorized to send emails on its behalf, ultimately reducing the chances of email spoofing and phishing. If you’ve ever noticed how some emails appear to come from familiar addresses but look suspicious, SPF was created precisely to combat instances like those. Through this framework, domain owners publish their policies in the Domain Name System (DNS), acting as a protective measure against unauthorized senders.
Think of SPF records as a guest list at an exclusive party. Only those on the list—specifically defined IP addresses and domains—are allowed through the door. This level of verification is vital in maintaining the integrity of email communications. A well-implemented SPF record helps ensure that legitimate emails are delivered while preventing malicious attempts to impersonate someone’s domain.
Recent statistics show that phishing attacks rose by an alarming 45% over the past two years. This underscores the urgent need for robust security measures, such as proper authentication rules like SPF, to protect both businesses and individuals.
To illustrate, let’s take a business domain named “example.com.” By setting an SPF record for this domain, its owner can designate specific servers, such as “mail.example.com,” and particular IP addresses as authorized senders. This proactive step drastically reduces the chances for cybercriminals to misuse the “example.com” domain, effectively protecting its reputation and integrity.
However, implementing SPF alone isn’t enough; understanding how it integrates with other security protocols can further enhance your email strategy and safeguard against evolving threats.
How SPF Enhances Email Security

SPF enhances email security by providing a clear, verifiable method to authenticate legitimate senders. This ensures that when an email arrives in your inbox, it comes from an authorized source. By blocking unauthorized servers from sending emails, it safeguards the integrity and trustworthiness of communications.
Think of SPF like a vigilant bouncer at an exclusive club; he checks IDs against a guest list before allowing anyone inside. If you’re not on that list, you simply won’t make it past the velvet rope. Similarly, SPF meticulously identifies which email servers are permitted to send messages on behalf of a specific domain, ensuring only trusted parties gain access to your communication stream.
Key Benefits
- Prevents Email Spoofing: The primary advantage of SPF is its ability to prevent spoofing attacks. By verifying the sender’s IP address against an established list within the domain’s DNS records, SPF stops attackers from masquerading as trusted sources. This protects both recipients and sender reputations.
- Improves Email Deliverability: When ISPs observe that emails come from verified sources, they are more inclined to deliver those messages directly to the inbox instead of relegating them to the spam folder. A transparent authentication method like SPF boosts your chances of reaching your audience effectively.
- Reduces Phishing Attacks: Since only authorized servers can dispatch emails for your domain under SPF specifications, phishing attempts become significantly less effective. Emails purporting to be from recognized brands will be recognized as possible imposters and are more likely flagged or rejected altogether.
It’s noteworthy that a large financial institution implemented SPF in 2024 and reported an impressive 30% reduction in phishing attempts within just one year. This statistic underscores how proper implementation of SPF can lead to real-world safeguarding against evolving threats.
With these advantages highlighted, it’s time to move on to the steps needed to create and manage an effective record tailored for your domain.
Creating an SPF Record for Your Domain

Creating an SPF record is essential for protecting your domain from email spoofing. It’s a straightforward process that can make a significant difference in your email security. By outlining which servers are authorized to send emails on behalf of your domain, you establish clear boundaries that help reduce the risk of phishing attacks and improve your email deliverability.
Step-by-Step Guide
Step I – Identify Your Mail Servers
Start by making a comprehensive list of all the email servers that send emails on behalf of your domain. This includes not only your in-house servers but also any third-party email services you use and mailing lists. For instance, if you have a marketing team that sends out newsletters using a service like Mailchimp or if you’re utilizing Google Workspace for business emails, those entities must be included in your SPF record. Taking the time to accurately identify all sending sources early on is essential.
Once you’ve compiled a complete list of these mail servers, you’ll need to format the SPF record correctly.
Step II – Format the SPF Record
The basic structure of an SPF record begins with v=spf1, which indicates the version of the framework being used. After this initial declaration, you’ll specify the authorized IP addresses and domains.
For example, if your office uses its own server in conjunction with a third-party service, your record will look something like this:
v=spf1 ip4:192.168.1.1 include:mail.yourdomain.com -all
The -all mechanism at the end signals that any sources not specified should not be considered valid, providing strong enforcement against unauthorized senders.
Formatting is crucial here; every detail matters to prevent potential vulnerabilities down the line.
Step III – Include Third-Party Services
If you rely on third-party services—for sending newsletters, transactional emails, or similar communications—it’s critical to integrate them into your SPF record as well.
Utilize the “include” mechanism effectively by adding their designated SPF records within yours. For instance, if you’re using Google’s email servers alongside your own, you’d write:
v=spf1 ip4:192.168.1.1 include:_spf.google.com -all
This allows Google’s servers to send emails on behalf of your domain without being flagged as unauthorized sources.
With all these components in place and your SPF record formatted correctly, you’re equipped to secure your email communications effectively and can now move on to how to add this record to your domain’s DNS settings.
Adding SPF Records to DNS

The process of adding an SPF record to your DNS may seem technical at first, but it’s quite straightforward when broken down into steps. To start, accessing your DNS management console is essential because this is where all email-related settings reside for your domain. You’ll typically log in to your domain registrar’s website; think of this as the control tower for your online presence.
Once logged in, navigate to the DNS management section—this may sometimes be called “DNS Settings” or “Zone Editor,” depending on your provider.
Step I – Access DNS Management
Once you’re in the management area, look for options related to DNS records. Most registrars have user-friendly interfaces where you can easily find what you need. It’s important to have patience here; understanding how each section functions will save time later, especially if you need to adjust settings frequently.
Now that you’re familiar with accessing your DNS console, it’s time to craft a new TXT record.
Step II – Add a New TXT Record
In this step, you will create a new TXT record, an essential type of resource record used for various purposes including the establishment of SPF records.
Find an option labeled “Add Record” or something similar and select ‘TXT’ as the record type. For the “Name” field, input your domain name (for example, simply using example.com without any prefixes). In the “Value” field is where you’ll paste the SPF record that you’ve created earlier. An example entry might look like this:
v=spf1 include:_spf.google.com ~all
This tells mail servers which servers are allowed to send emails for your domain.
With your new record drafted, the next step is all about ensuring your settings take effect.
Step III – Save Changes
Finally, save your changes! It’s a critical action that solidifies all of your hard work up until now. After saving, be aware that DNS propagation can take some time—up to 48 hours in some cases—as updates ripple through the internet’s decentralized system. During this period, not all users will see the changes immediately; however, rest assured that they will eventually reflect globally.
Regularly monitoring and verifying that your SPF record works correctly will help maintain your domain’s integrity and prevent future complications associated with unauthorized emails being sent from your address.
By following these simple yet effective steps in adding an SPF record to your DNS setup, you’re taking a significant stride toward implementing a robust email policy that protects against spoofing attempts and strengthens overall email security for your communication practices.
As we progress further into maintaining effective email security, it’s crucial to understand how to validate and monitor the configuration of your record to ensure everything is functioning as intended.
Verifying Your SPF Setup
The verification process involves a few critical steps that can be easily executed, providing peace of mind knowing your email security is on the right track.
First, let’s check your SPF record syntax. It’s easy to create mistakes when inputting your SPF records into your DNS settings, leading to dire consequences for email deliverability. Using online tools like MXToolbox or Kitterman, you can enter your domain name, and these tools will analyze your SPF record for technical errors. They will flag issues such as a missing “v=spf1” declaration or incorrect IP addresses in real-time—saving you from potential future headaches.
Once you’ve confirmed that your syntax is correct, the next step is to send test emails.
Sending test emails allows you to observe how different email services handle messages originating from your domain. Aim to send emails to major providers like Gmail, Outlook, and Yahoo. After sending these emails, check their headers closely for “Received-SPF” or “Authentication-Results.” This information will indicate whether the SPF check passed or failed, shedding light on whether your configuration is functioning correctly. Not passing the SPF check could mean the difference between an email reaching a recipient’s inbox or getting filtered out as spam.
Further, it doesn’t stop there; ongoing monitoring is just as important.
Regularly reviewing your email logs provides valuable insights into how well your SPF configuration holds up over time. Misconfigurations often go unnoticed until they cause significant issues, so maintaining vigilance can alert you to unauthorized servers trying to send emails using your domain—which could damage your reputation and credibility as an organization. Monitoring tools designed for email use are available to help scrutinize authentication failures or discrepancies in server activity effectively.
With these verification steps completed, you’ll have a solid foundation for your SPF configuration. However, it’s crucial to recognize common pitfalls that may arise during setup to avoid setbacks later on.
Being aware of these potential issues can bolster the integrity and effectiveness of your email security strategy significantly while guiding us towards examining frequent errors encountered in configurations.
Common Pitfalls in SPF Configuration

Even a seemingly flawless SPF setup can quickly turn problematic. One of the most frequent issues you’ll encounter is having too many DNS lookups. SPF limits you to a maximum of 10 DNS lookups per check. This means that if your SPF record has multiple “include” directives—pointing to other domains or records—you may inadvertently exceed that threshold, leading to validation failure.
Simplifying your SPF record by minimizing these includes can greatly enhance its effectiveness. Think of it like packing for a trip: the more you add without reconsidering what’s essential, the heavier your load becomes and, ultimately, the harder it is to manage.
Another important consideration is how forwarding affects email deliverability.
Forwarding issues are also notorious for creating trouble with SPF. When an email gets forwarded, it often passes through an intermediary server that may not appear on your authorized sender list. As a result, the forwarded message can end up failing SPF checks.
To counter this, employing DKIM and DMARC alongside SPF can provide additional layers of security and flexibility. This dual approach effectively authenticates messages sent from your domain while still allowing for legitimate forwards.
Moving away from forwarding concerns, it’s crucial to also address how subdomains factor into your overall configuration.
Ignoring subdomains can lead to significant pitfalls as well. If your main domain—let’s say “example.com”—has a designated SPF record but you fail to create separate SPF records for subdomains like “mail.example.com” or “support.example.com,” you risk those emails being rejected. A vivid example comes to mind: a company overlooked their support subdomain in their SPF settings, which resulted in failed SPF checks for crucial emails sent to customers seeking assistance. This oversight hampered communication and undermined customer trust.
Managing your SPF configurations requires attention to detail, but ensuring all potential sending domains are covered will pay off handsomely in terms of reliability and reputation.
Understanding these common pitfalls allows you to fortify your email security strategy and maintain effective communication practices across various channels.
While configuring SPF might seem daunting initially, careful attention to DNS lookups, forwarding mechanics, and subdomain inclusions can pave the way toward a streamlined deployment that ensures your emails consistently land in inboxes rather than spam folders.
With an understanding of these elements in place, we can now evaluate specific examples that illustrate the best practices for configuring and using SPF effectively.
Practical Examples of SPF Records
Creating an SPF record is like setting the boundaries for your email domain; you define who gets to send emails on your behalf. This not only helps in ensuring that your domains are less likely to be misused but also enhances your overall credibility in email communications.
Example 1 – Single Server
Consider a scenario where you have a dedicated mail server at the IP address 192.0.2.1. The SPF record would look like this:
v=spf1 ip4:192.0.2.1 -all
In this case, you’re laying down the law—only emails sent from this single server are considered legitimate for your domain. Emails from elsewhere are marked as unauthorized and either go straight to spam or are rejected outright. This strict policy is effective for small businesses or personal domains relying on one primary server.
Example 2 – Multiple Servers
As your needs expand, using multiple servers might become necessary. For instance, if you have two different ranges of servers, you could write:
v=spf1 ip4:192.0.2.0/24 ip4:198.51.100.0/24 -all
This SPF record authorizes any IP address in the specified ranges as legitimate senders for your domain. This setup is useful for organizations using several servers or services to manage their mailing lists, allowing for flexibility while maintaining security against spoofing.
Example 3 – Including Third-Party Services
In today’s digital world, businesses often engage third-party services to handle their email correspondence, such as Google Workspace or Mailgun. To accommodate these services, you would create an SPF record like this:
v=spf1 include:_spf.google.com include:mailgun.org -all
By employing the include mechanism, you approve Google’s and Mailgun’s servers to send emails on behalf of your domain while keeping everything else secure and contingent upon predefined rules.
These examples illustrate not just how to craft SPF records tailored to specific needs but also highlight the importance of making accurate and timely updates as your email infrastructure evolves.
Ensuring that your SPF records are well-constructed is essential for protecting your email communication from potential threats and misuse while simultaneously reinforcing your reputation as a trusted sender.

How does SPF work alongside other email authentication protocols like DKIM and DMARC?
SPF (Sender Policy Framework) works in conjunction with DKIM (DomainKeys Identified Mail) and DMARC (Domain-based Message Authentication, Reporting & Conformance) to enhance email security. While SPF verifies that an email comes from an authorized server, DKIM adds a cryptographic signature to the email header for validation by the receiving server. DMARC builds on both by allowing domain owners to specify policies for handling emails that fail SPF or DKIM checks, thereby reducing phishing attacks by 80% according to recent studies. Together, these protocols form a robust defense against email spoofing and ensure greater trust in email communications.
What are the common mistakes to avoid when setting up SPF?
Common mistakes to avoid when setting up SPF include misconfiguring the SPF record, such as using “include” directives incorrectly or failing to account for all sending servers, which can lead to email delivery failures. Another pitfall is not regularly updating the SPF record when changes occur in your email infrastructure, leading to outdated policies. According to studies, organizations that fail to maintain accurate SPF records experience up to a 20% increase in email bounce rates, compromising overall communication efficiency. Always ensure your SPF record is precise and comprehensive to enhance email security and deliverability.
What are the components of an effective SPF record?
An effective SPF record typically consists of several key components: the “v=spf1” version tag, mechanisms such as “ip4” and “ip6” to specify authorized senders’ IP addresses, “include” to permit other domains to send on behalf of your domain, and a policy qualifier like “~all” or “-all” at the end to indicate how strictly to enforce the SPF rule. A well-configured SPF record helps reduce email spoofing and phishing attempts; statistics show that domains with SPF records can reduce unauthorized use by up to 80%, significantly improving email deliverability and security.
How do you implement an SPF record for your domain?
To implement an SPF record for your domain, first, identify all the IP addresses and domains that are authorized to send emails on your behalf. Next, create a TXT record in your DNS settings starting with “v=spf1” followed by the authorized sender information and end it with “~all” or “-all” to specify how strict you want the policy to be. For instance, “v=spf1 include:example.com -all” allows example.com to send emails for your domain while rejecting all others. As a best practice, ensure your SPF record is regularly updated; studies show that improper SPF configurations can lead to email spoofing incidents, which affect 32% of businesses globally.
What impact does having an incorrectly configured SPF record have on email deliverability?
An incorrectly configured SPF record can severely impact email deliverability by causing legitimate emails to be marked as spam or rejected outright by recipient servers. According to studies, organizations without proper SPF records may experience up to a 70% increase in email bounces and rejection rates, leading to a significant loss in communication and potential revenue. To ensure effective email authentication, it’s essential to maintain accurate SPF configurations that align with your sending practices.