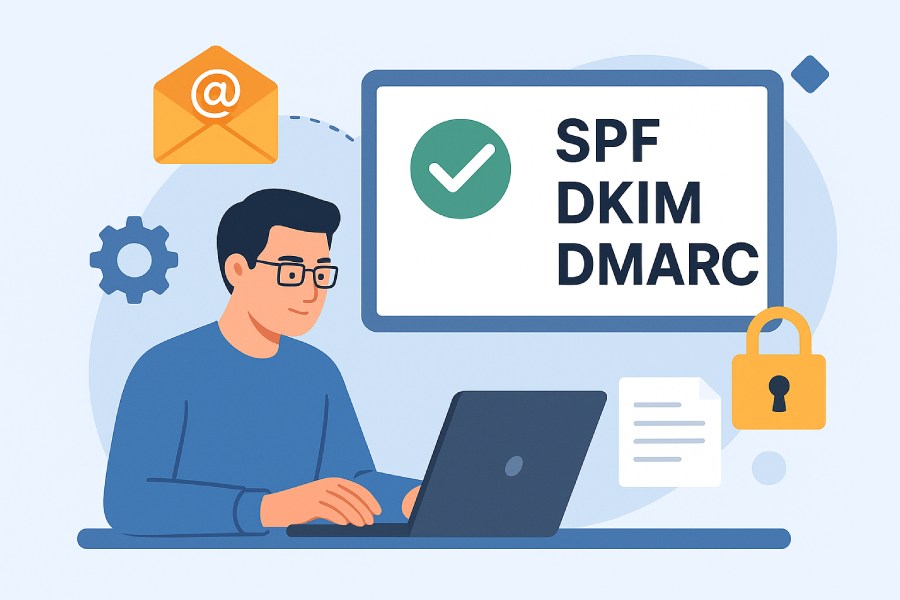
Configuring SPF, DKIM, and DMARC for Loops.so: A guide

Quick Answer
To authenticate mail sent through Loops.so: register the domain in Loops, then complete the DNS records on the Improve Email Deliverability page. MX records first: copy the MX record from Loops, log into the DNS console, add the record under the domain's advanced DNS settings, and save. SPF: copy the SPF value from Loops's setup page, add a TXT record at the apex with the SPF string (or merge into the existing SPF record if one exists, since multiple SPF records cause permerror). DKIM: Loops uses three CNAME records rather than a TXT record; copy each, add three CNAME records in the DNS console with the names and target values Loops provides, save. DMARC: publish a TXT record at _dmarc.yourdomain.com starting with p=none and rua reporting (e.g., v=DMARC1; p=none; rua=mailto:reports@yourdomain.com). Wait for DNS propagation, then verify with Loops's verification step. Once SPF and DKIM pass for Loops's outbound mail, move DMARC toward p=quarantine and then p=reject. The reason this matters: receiving servers don't trust 'we use Loops' as authentication; they need the cryptographic and DNS-published proof.
Configuring SPF, DKIM, and DMARC for Loops.so: A guide
Sending out email campaigns isn’t just about crafting nice-looking emails; they should also be authenticated and secure. So, whether you are sending these emails directly from your mailbox or using an external email platform like Loops, you need to ensure that the receiving servers trust your emails and that they are delivered securely to the recipient’s inbox.
With a tool like Loops, you might think that your outgoing emails are safe by default, after all, you’re using a trusted platform. But the truth is, email isn’t inherently secure, and no matter the platform, your email can be perceived as suspicious by the receiving server, or, worse, intercepted by an attacker.
To address this issue, set up proper email authentication protocols that prove your emails are genuine and authorized. And in this article, we will learn how you can secure your emails sent through Loops.so with SPF, DKIM, and DMARC.
How to authenticate your emails sent through Loops?
Now that we know that emails are not secure by themselves, your aim should be to make them trusted and verifiable. One of the most effective ways to do so is by configuring your domain with SPF, DKIM, and DMARC.
By authenticating your emails, you’re giving receiving servers the proof they need that Loops is officially allowed to send on your behalf, that your messages haven’t been tampered with, and that your domain isn’t being misused by spammers.
Let’s see how you can do this:

Configure the MX records for Loops
The first step to authenticating your emails with Loops is to set up your MX record. This step helps Loops verify your domain ownership and improve email deliverability.
Here’s how you do it:
- First up, register your domain in Loops
- Once you’ve registered, Loops will automatically prompt you to set up email deliverability
- Go to the “Improve Email Deliverability” page, where you’ll find all the DNS records you need to add.
- Start with the MX records
- Copy the MX record shown in your Loops dashboard.
- Log in to your DNS Management Console, select your domain, and go to Advanced Settings, then Manage.
- Add a new MX record, then paste the copied details into the correct fields.
- Save the changes
Set up SPF record for Loops
After adding your MX record, the next step is to add the SPF record, which tells the email providers that Loops is allowed to send emails from your domain. Follow these steps to add an SPF record:
- Go to the SPF section in your Loops setup page.
- Copy the SPF record provided by Loops.
- Now, log in to your DNS management platform. Here, select your domain and open Advanced Settings or Manage DNS.
- In this section, click on “Add new TXT record” and paste the SPF value into the appropriate fields.
- Save the changes and wait while the record updates in the DNS.
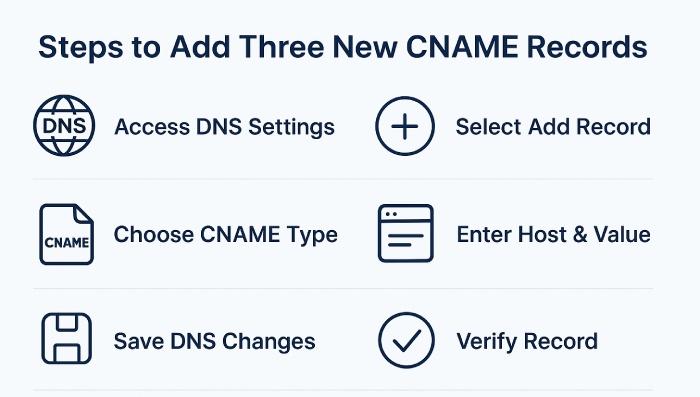
Set up a DKIM record for Loops
For implementing DKIM for Loops, you need to add CNAME records to your domain’s DNS settings.
Here’s how to do it:
- Go to the DKIM section in your Loops dashboard.
- Here, copy the DKIM record given by Loops.
- Next, log in to your DNS management console and select your domain.
- Open Advanced Settings or Manage DNS, depending on your provider.
- In this section, add three new CNAME records and paste the DKIM details you copied into their respective fields.
- Save the changes and allow some time for the DNS to update these changes.
Configure DMARC record
Implementing DMARC for Loops is the final step to securing your domain and ensuring your outgoing emails are fully authenticated. By implementing DMARC, you get control over emails that fail authentication and visibility into the email activity of your domain.
The process of configuring DMARC records is similar to how you set up SPF and DKIM. All you have to do is add a TXT record to your domain’s DNS settings using the details provided by Loops.
But the catch here is that with Loops, you cannot monitor or view DMARC reports directly from the platform. The platform allows you to publish a DMARC record for your domain, but it doesn’t include any built-in reporting or analytics to track how your emails are performing under that policy.
Moving ahead
Email authentication really works when you regularly monitor, review, and update your authentication records. This is why reports are just as important as the records themselves.
To make the best of DMARC’s reporting feature, it is best that you rely on a dedicated DMARC monitoring platform. This will give you comprehensive insights into what’s really going on with your domain, and with this information, you can further fine-tune and strengthen your domain’s security and email deliverability.
To learn more about DMARC reporting and what it means for your domain, get in touch with DuoCircle today!
Topics
General Manager
General Manager at DuoCircle. Product strategy and commercial lead across the email security portfolio.
Secure your email infrastructure
Protect, authenticate, and deliver. Contact our team to find the right solution.