
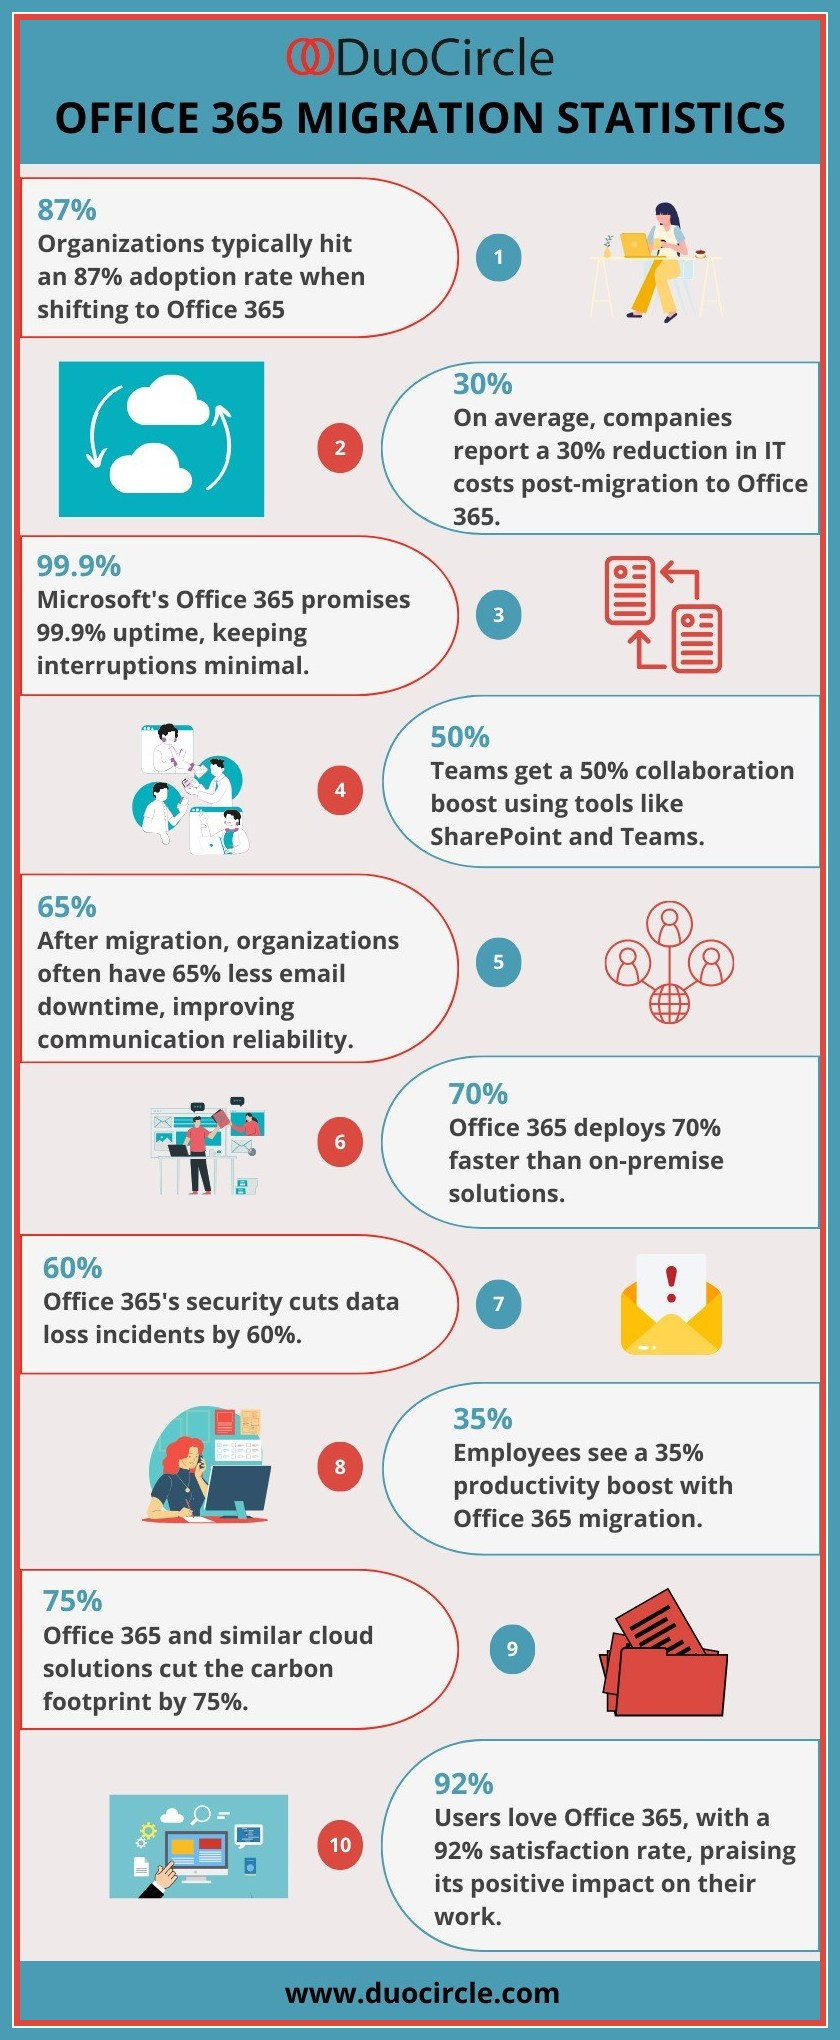
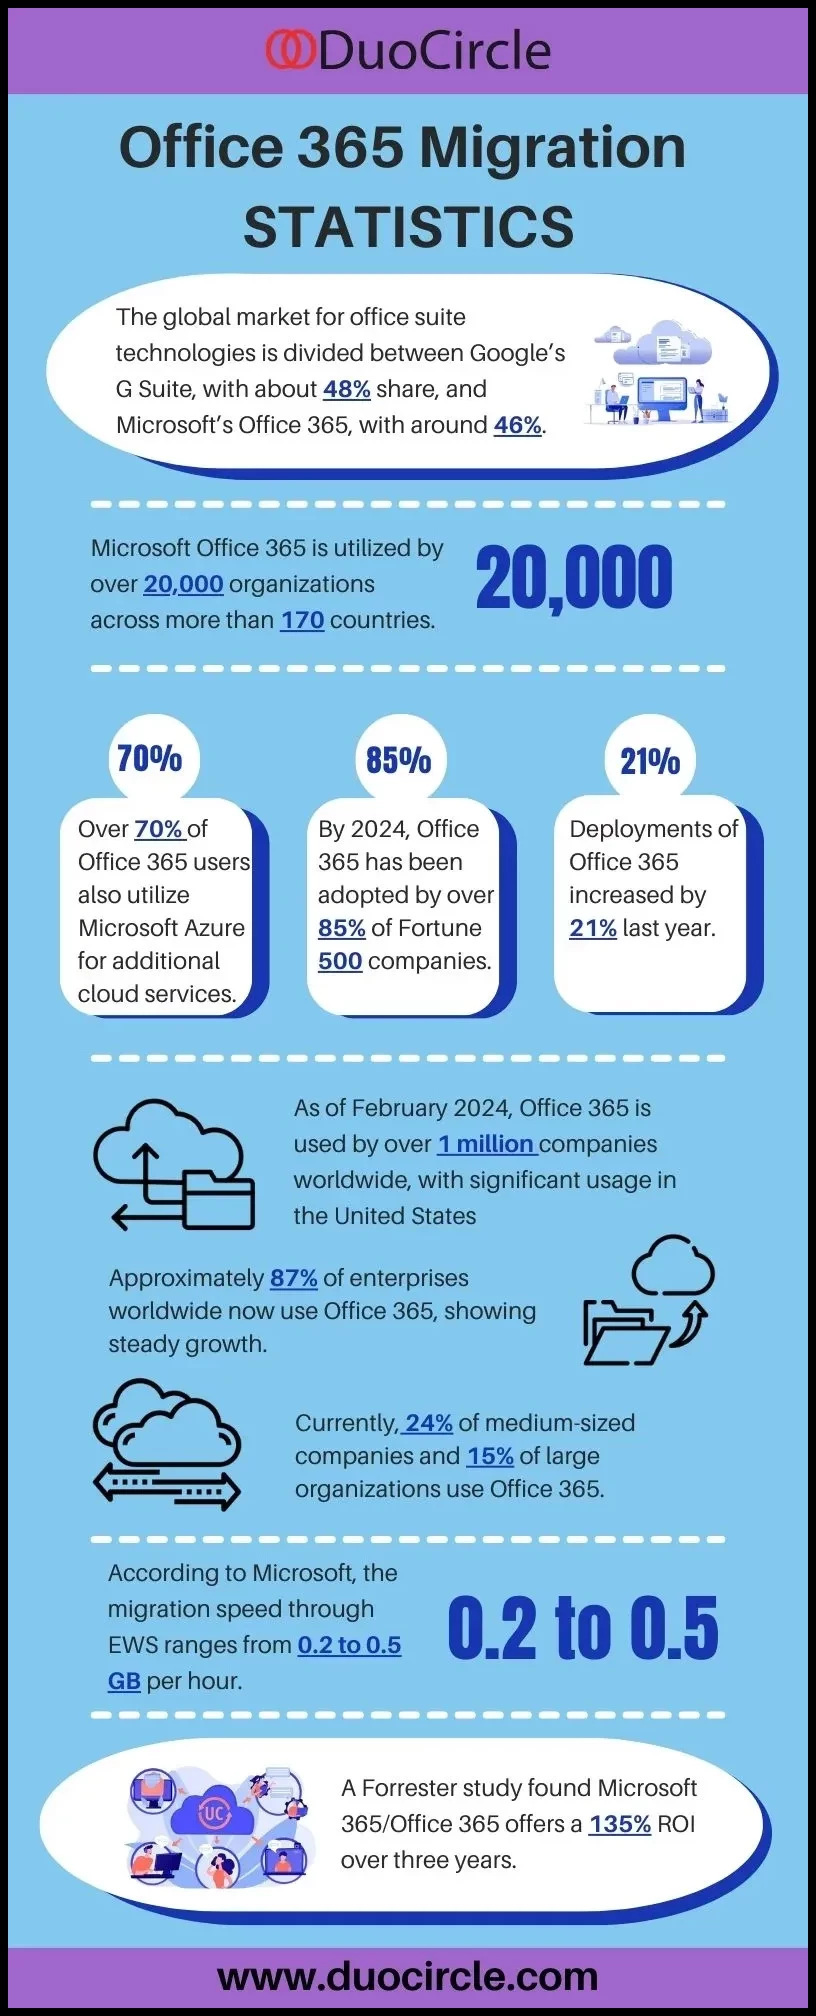
Office 365 Tenant to Tenant migration is one the most confusing features in Office 365. In this post, Migrate Office 365 tenant to tenant, we are going to discuss various scenarios for tenant to tenant migration, benefits of tenant to tenant migration, and step by step tenant to tenant migration.
Why do users need Office 365 tenant to tenant migration?
The Office 365 suite owned by a site is linked to a renter. As a tenant of Office 365, we retain all the data stacks, such as SharePoint, OneDrive, and Yammer. This publishing platform can allow multiple distinct data sources, such as Exchange Server data (which stores email communications) and Active Directory data, to sit together under one roof.

Challenges users will face while migrating from One office 365 tenant to another ?
Users are encountering a number of challenges when completing this task. Some of them are mentioned here:
- This O365 tenant-to-subtenant migration is a difficult and tedious process. Users will need to undergo a lot of difficulties while executing this operation.
- One of the biggest issues leading this operation is keeping the information integrity.
- Executing the steps correctly is a necessity for maintaining information integrity. People may experience data loss during the process.
Migration planning from start to end
Step 1: Domain preparation
Now, users must follow these steps for a smooth Office 365 migration:
- Make sure that you have your Office 365 license prepared.
- Then, create admin accounts in both the source and target for easier migration.
- Then, users must create mailboxes, room resource mailboxes, and distribution groups in the target.
- Apply AD DS consolidation using AD DS tools and synchronize source and destination domains if needed.
- It is essential to train employees regarding how to use Microsoft 365 after migration.
Step 2: Domain Verification
- 365 is authenticating your target tenant domain.
- Then, input the source Microsoft 365 domain in your target admin center for DNS-based TXT records.
Step 3: Schedule Migration
- First, make a list of user mailboxes that are required for migration and for mapping, create a .csv file.
- Write down the minimal value of TTL on the MX record (of the primary email address domain). Hold off on directory sync for the source tenant (from Microsoft 365 admin center) in order to stop any sync changes in source tenant AD DS to Microsoft 365.
- In Microsoft 365 admin center, disable directory sync for the source tenant to prevent the syncing of any modifications to source tenant account ADFS 2 to Microsoft 365 cloud. Minimum 24 hours will be required until this process is complete.
Step 4: Migration stage
Top inbound mail flow: Interrupt inbound mail flow to the recipient by changing your primary MX record to a value of –1 or by removing a third-party application. Since projection done in the preparation phase for the designated lowest value of TTL on the MX record of your primary domain shows, you should be able to plan this step.
- Preparing source tenant: Before you move your enterprise 365 mailbox to yet another tenant, the principal mail domain must be erased from every one of the objects in the source tenant.
-
- Reset the default email address to the origin email address of Microsoft Office 365.
- Remove all the Lync licenses from the source tenant using the Lync Admin Portal.
- Then, reset the default email address of distribution lists, rooms, resources to the initial domain.
- From all tenants remove all the secondary email addresses In the Windows PowerShell, run the command Get-MsolUser -DomainName xyz.com to retrieve all of the boxes that are still using the primary email address or refusing to remove.
- Preparation of target domain: Verifying the source tenant in the desired domain is the place where this process begins.
-
- Continue reading Configuring auto-discover CNAME.
- Then configure a new domain name in the target tenant for AD FS.
- Now, activate the newly-created user accounts in the desired domain and then assign licenses.
- Create a source domain as the main email address for those who are new to the app. In addition, share the passwords with the end users.
- Once the user mailboxes are active, change the mail delivery setting and point the MX record to the Office 365 address. Then, test mail flows out and in of the target tenant.
In conclusion, Migrating tenant to tenant in Office 365 is convenient and straightforward. The steps involve exporting tenant data, transferring data to the new tenant, configuring global settings, and applying roles.