Everything you need to know about setting up email authentication on Mailchimp!

Quick Answer
Setting up email authentication for a custom domain on Mailchimp covers SPF, DKIM, and DMARC and uses CNAME records on the domain provider side. Steps: 1) In Mailchimp click your profile icon and select Account, then Domains. 2) Find your domain and click Start Authentication, choose your domain provider from the dropdown (or Other), then Next. 3) Open the domain provider's DNS panel in another tab. 4) In Mailchimp, click Copy on the new CNAME records and paste them into the matching fields in your DNS panel; values are customized per domain and ESP. 5) Add the DMARC TXT record with rua=mailto:address@example.com, ideally a dedicated mailbox so reports don't clutter primary inboxes. To apply a different DMARC policy at subdomain level, add sp=none, sp=quarantine, or sp=reject. 6) Click Next; verification typically takes 24-48 hours. Once Mailchimp confirms, the domain shows an Authenticated label on the Domains page; if the process fails, the Domain Overview page in Email Domains explains what to fix.
Everything you need to know about setting up email authentication on Mailchimp!
If you want your emails to reach your subscribers’ inboxes without any hassle, setting up email authentication for your authorized domain is something you can’t afford to ignore. Domain authentication enables you to send out your emails to the right inbox. It also enables you to maintain your subscriber base and grow them eventually by keeping them actively engaged.
This article explores the intricacies of setting up email authentication for your custom domain on Mailchimp.
Email authentication- How does it work?
Renowned email hosting services such as Gmail, Hotmail, and Yahoo always prioritize user safety. That’s precisely why they wish to ensure that all the emails that are sent out to their users are absolutely safe and legitimate. To ensure user safety, these email hosting services leverage full-fledged security procedures and protocols such as SPF (Sender Policy Framework), DKIM (DomainKeys Identified Mail), and DMARC (Domain-based Message Authentication, Reporting and Conformance).
In order to authenticate your business domain, you can also use Entri to be able to update domain records. This is possible only after you have entered your domain credentials. Another alternative is that it is possible to copy and paste the entire information from Mailchimp onto your domain records.
Pro tip: Work with 2 tabs or browser windows simultaneously, as this will allow you to move between the Mailchimp website and your domain records seamlessly. Stay with us to get a detailed, step-by-step guide on how to find and add a CNAME record, depending on your provider.
How to copy-paste the authentication information?
Once you are done with email domain verification, you will have to copy some significant details from your Mailchimp account and paste them onto your domain’s CNAME records.
The steps and procedure to create CNAME records may vary depending on the management software or domain providers. Here, you will get a customized, step-by-step guide that matches your service provider well. In case your service provider is not listed here, feel free to follow the generic set of steps that we will provide you with.
Follow the below-mentioned steps in order to authenticate your domain information:
- Simply click on your profile icon and select ‘Account.’
- Next, click on ‘Domains.’
- You will get to see the option ‘Start Authentication’ beside the business domain you wish to work with.
- Now, simply select your domain provider from the dropdown and then click on the ‘Next’ option. If you do not see your software or service provider listed, make sure to click on ‘Other.’
- Open another tab or browser window. Now you will have to navigate to the official website of your domain provider. There, you will find your domain’s records. Based on your service provider, we will help you with apt guidance as to how to find the domain’s records. Once you have found them, go to Mailchimp and then click on the ‘Next’ option.
- Now, you’ll have to follow the instructions to create new CNAME records. For this, you are required to click on ‘Copy’ in order to copy all the values for your new records. Next, you will have to paste them into suitable fields for your domain. The values that you have just pasted are customized so that they can align with your business domain and email service provider. Once you are done with this, navigate back to Mailchimp and then click on ‘Next.’
- Now, follow the instructions to create a new DMARC record. You will get all the DMARC reports delivered to your inbox. Experts suggest that you use a dedicated or third-party email to get your DMARC reports delivered. This will keep you sorted and de-cluttered.
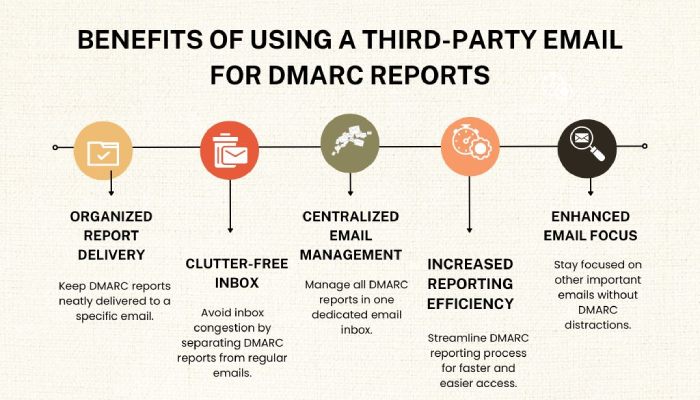
But how to send your DMARC report to a separate email ID? Simply include rua=mailto:xxxxx in the TXT Value.
Now suppose that your domain (service.com) has a valid DMARC record. Then other subdomains, such as subdomain.service.com, will also come under the same DMARC record. In order to apply a unique DMARC record to one or multiple subdomains, here’s what you need to do:
Add sp=none, sp=qurantantine, or sp=reject in the TXT Value.
8. Lastly, click on ‘Next.’
Now, all you need to do is wait patiently for Mailchimp to verify and confirm all the data. You may have to wait for 24 to 48 hours to get your domains updated.
Final confirmation
The moment Mailchimp verifies and confirms your records, your email domain will get authenticated. You will also receive an email from Mailchimp when the authentication process is finally completed. In case there is some issue in completing the authentication process, Mailchimp will notify you through email.
Once you have successfully authenticated your domain, you will get to see a label that says ‘Authenticated’ just alongside your domain. This will be available on your account’s Domains page.
However, if the authentication process is not complete yet, then you are required to visit the Domain Overview page in the Email Domains section. Here you will get all the necessary guidance as to what changes or updates should be done to complete the authentication process successfully.
Wrapping up!
Email authentication is completely non-negotiable if you are serious about your business email communications. By authenticating your domain in Mailchimp, you get a step closer to enhanced email deliverability while also building trust among your audience. Not only this, but email authentication also safeguards your domain against cyberattacks.
Failing to do so may lead to your emails being marked as spam. Or the engagement rate may go down drastically. There is also a high risk of potential cyber threats. You can simply follow the steps mentioned in this article and ensure that your emails always reach the right inbox, thereby maintaining your brand reputation. You can also seek help from your in-house IT team to set up email authentication in Mailchimp.
If you haven’t set up your email authentication yet and are still on the fence, take this as a sign to act today! DuoCircle can help ensure your email marketing campaigns have the best chance to succeed!
General Manager
General Manager at DuoCircle. Product strategy and commercial lead across the email security portfolio.
Secure your email infrastructure
Protect, authenticate, and deliver. Contact our team to find the right solution.