
Cloudflare’s new SPF, DKIM, and DMARC requirements
Starting July 3, 2025, Cloudflare requires all emails to be authenticated using at least one of the protocols. SPF or DKIM, to forward them. This requirement has been imposed in consideration of the growing number of email-based phishing and spoofing attacks. These email authentication protocols ensure that only authorized emails reach the inboxes of recipients, thereby preventing them from being manipulated into transferring money or sharing confidential information.
What do SPF, DKIM, and DMARC do?
SPF, DKIM, and DMARC essentially prevent email-domain abuse so that emails sent by threat actors don’t reach the targeted recipient. Here’s a little about each of these protocols–
SPF
SPF stands for Sender Policy Framework. It works by allowing the domain owners to publish an extensive list of mail servers and IP addresses that are officially permitted to send emails on their behalf. Any email sent from a server or IP address outside of that list is considered potentially malicious. With SPF in place, such a message is either marked as spam or rejected, depending on what action you have specified in your SPF record.
DKIM
DKIM is short for DomainKeys Identified Mail. When an email is sent, your domain’s private DKIM key creates a digital signature. This digital signature is added to the email’s hidden headers, which aren’t visible to users.
So, when the recipient’s server gets your email, it also receives the secret signature, which is then checked against the public key in your domain’s DNS records. If the signature matches (i.e., it has not been altered), the email is considered trustworthy.

This technology ultimately prevents email tampering, builds trust with inbox providers, and improves email deliverability.
DMARC
DMARC’s full form is Domain-based Message Authentication, Reporting, and Conformance. This email authentication protocol is like a security guard for your email domain. DMARC works in tandem with SPF and DKIM; it always checks-
- If your email has passed at least one of the protocols— SPF or DKIM
- Whether the domain in the “From” address matches the domain authenticated by SPF/DKIM (this is called alignment).
If the email fails these checks, DMARC instructs the receiving server on how to handle it—allow it, send it to spam, or reject it entirely—based on the domain owner’s published policy. It also sends reports to the domain owner, allowing them to monitor and rectify any misuse or misconfigurations.
Cloudflare’s Update on SPF and DKIM (Starting July 3, 2025)
Starting July 3, 2025, Cloudflare will only allow emails sent through its Email Routing service if they pass either SPF or DKIM checks. If an email doesn’t have either, Cloudflare will still forward it to the mailbox provider (like Gmail or Outlook), but it may not be trusted.
Cloudflare also recommends setting up DMARC for better protection.
This update indicates that Cloudflare is becoming stricter about email security, similar to major email providers such as Google, Microsoft, and Yahoo, which already follow similar rules to prevent email fraud and protect users.

Why do these requirements matter?
Cloudflare’s SPF and DKIM requirements help-
Fight spam, phishing, and spoofing
This new requirement from Cloudflare will make it harder for threat actors to send unauthenticated and forged emails. By insisting that all emails sent through its Email Routing service must pass either SPF or DKIM checks, Cloudflare ensures that only messages with a verifiable link to the sender’s domain can be delivered.
This way, cybercriminals won’t be able to impersonate a brand’s identity and bypass spam filters. As a result, recipients are less likely to fall for phishing emails disguised as legitimate communication.
Protect recipients and domains
Without SPF and DKIM, emails from unverified and unauthenticated sources reach your recipient’s inbox, leaving a dangerous gap that bad actors exploit to send misleading messages. By enforcing authentication, Cloudflare minimizes the risk of recipients falling for scams that appear to come from trusted sources, such as their bank, HR department, or a recognized brand.
For domain owners, SPF and DKIM prevent adversaries from spoofing their domains, thereby protecting their brand reputation and potentially avoiding legal consequences. By enforcing authentication for emails, domains remain in good standing and maintain long-term trust with mailboxes and recipients.

In simple words, Cloudflare’s new requirement is not just a technical upgrade; it’s a move that strengthens both sender credibility and recipient safety across the board.
Align with industry standards
This move by Cloudflare will also ensure that brands align with evolving industry-wide email standards established by major players such as Google, Microsoft, and Yahoo. These providers have already begun enforcing strict authentication rules, including mandatory SPF, DKIM, and DMARC checks, to reduce spam, phishing, and domain abuse across the board. By requiring SPF or DKIM for all outbound messages, Cloudflare ensures that brands using its Email Routing platform meet the same foundational standards expected by top inbox providers.
This alignment goes beyond just technical compliance; it essentially shows that the domain owner cares about protecting their communications and respecting the security expectations of modern email ecosystems.
How to get started with SPF and DKIM?
Steps to deploy SPF
Step 1: Identify your sending sources
Make a list of all the services that send emails on your behalf — like your own mail server, CRM tools, marketing platforms (Mailchimp, HubSpot), etc.

Step 2: Access your domain’s DNS settings
Log in to your domain registrar or DNS provider (like GoDaddy, Cloudflare, or Namecheap) and open the DNS management panel for your domain.
Step 3: Create your SPF record
Write an SPF TXT record that lists all the IPs or services allowed to send emails for your domain.
Example: v=spf1 include:domain.org ip4:192.0.2.1 -all
Step 4: Add the SPF record to DNS
Add a new TXT record to your domain’s DNS with:
- Name/Host: @ or your domain name
- Value: The SPF record you just created
- TTL: Default or 3600 seconds (1 hour) is fine
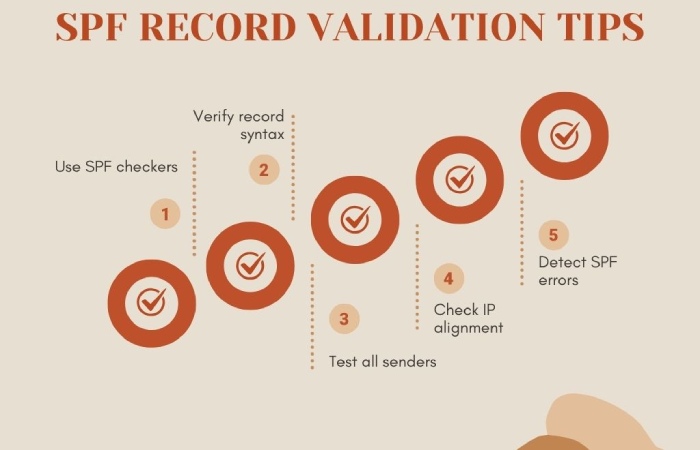
Step 5: Test and validate
Use tools like MXToolbox or Kitterman SPF Checker to ensure your SPF record is valid and covers all sending sources.
Steps to deploy DKIM
Step 1: Check if your email service provider supports DKIM
Most email services (like Google Workspace, Microsoft 365, Zoho, Mailchimp, etc.) support DKIM. Log in to your email provider’s admin settings and search for DKIM settings.
Step 2: Generate the DKIM keys
Your provider will give you a DKIM public key (to publish in DNS) and use a private key behind the scenes to sign your emails.
Step 3: Add the DKIM record to DNS
In your DNS provider’s dashboard:
- Record type: TXT
- Name/Host: Something like selector._domainkey (selector is chosen by your provider, like google, default, or mail)
- Value: The long DKIM public key
- TTL: Default (1 hour or 3600 seconds is fine)
Step 4: Enable DKIM signing in your email platform
Once the DNS record is live, go back to your email provider and activate DKIM signing. This will start adding DKIM signatures to your outgoing emails.
Step 5: Verify it’s working
Send a test email to tools like dkimcore.org/tools or check the headers in Gmail to see if DKIM=pass.
If you need assistance setting up SPF, DKIM, and DMARC, please don’t hesitate to reach out to us. We deploy and manage these protocols on behalf of domain owners.