Setup HostGator Email: A Step-by-Step Guide for Your Account

Quick Answer
To set up HostGator email: log in to your HostGator Customer Portal, open cPanel, go to Email Accounts, click Create, enter the address (you@yourdomain.com) and password, set the mailbox quota, and create. To use the mailbox in a client, configure incoming mail with IMAP (port 993, SSL/TLS) for multi-device sync or POP3 (port 995, SSL/TLS) for single-device download, and outgoing SMTP on port 465 (SSL/TLS) or 587 (STARTTLS) using the full email address as the username. Webmail is available at webmail.yourdomain.com. For deliverability, publish SPF, DKIM, and a DMARC policy at _dmarc.yourdomain so your outbound mail authenticates.

Setting up your HostGator email account might seem like a task reserved for the tech-savvy among us, but worry not, it’s easier than you think! Whether you’re starting fresh or moving from another service, having an email that matches your domain adds a professional touch to your communications. With the right guidance, you’ll sail through the setup process without a hitch. Let’s dive into this step-by-step guide that simplifies every stage, ensuring you can focus on what matters most, connecting with your audience and clients effortlessly.
To set up your HostGator email account, log in to your cPanel and navigate to the “Email Accounts” section. From there, create a new email account by entering your desired address and password, then configure the incoming and outgoing mail settings using IMAP protocol for efficient access across multiple devices.
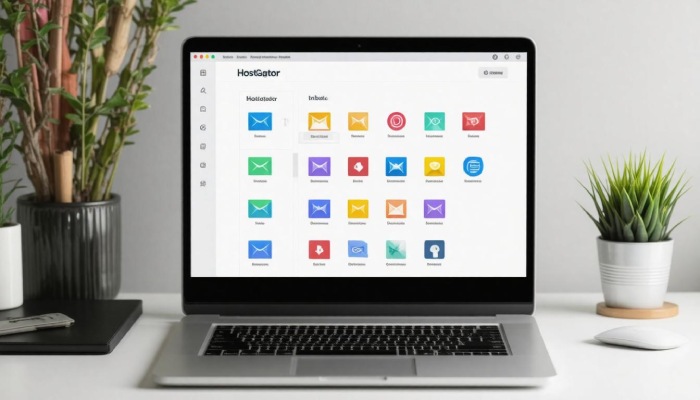
Accessing the Control Panel

To start setting up your HostGator email, getting to the control panel, known commonly as cPanel, is your first step. This is where all the magic happens; it’s the central hub for managing every aspect of your HostGator account. Picture it as the cockpit of an airplane: it has everything you need to ensure a successful flight through your email setup journey.
Begin by logging into your HostGator account. Head over to the HostGator homepage, and you’ll notice a section labeled ‘Customer Portal Login.’ Click on that, enter your credentials, this typically consists of your username (which usually follows the format username@yourdomain.com) and password, and log in. You’ll be greeted with an accessible dashboard designed to streamline your user experience.
Remember: If you’ve forgotten your password, there’s a recovery option available that allows you to reset it seamlessly.
Once logged in, you’ll want to navigate to cPanel. Look at the top menu on your dashboard where you’ll find an option labeled ‘Hosting.’ Clicking on this will unveil a dropdown where you can locate your domain. Select it and click ‘Manage’, which will lead you one step closer to cPanel.
Now comes the exciting part: accessing all your email management tools.
When you’re inside cPanel, look for the distinct ‘Email’ section. This area will contain several options tailored for email configuration. Click on ‘Email Accounts’, and just like that, you’ve arrived at the page where you can create and manage all of your HostGator email addresses effortlessly. Here, you can set up new accounts, adjust existing settings, or even delete addresses that are no longer needed.
Understanding cPanel is essential not only for setting up emails but also for other important tasks like managing storage quotas and creating forwarders or autoresponders. Each function contributes significantly to maintaining effective communication within your business or personal projects.
Quick Tip: Always use a supported browser (such as Google Chrome or Mozilla Firefox) for optimal functionality when navigating through cPanel. This ensures smoother access without any hiccups.
The control panel can feel overwhelming due to its vast array of features and options at first glance, but spend some time familiarizing yourself with it, and you’ll find it’s straightforward and intuitive. The more comfortable you become with navigating cPanel, the easier it will be to manage not only your email settings but also other aspects of your hosting capabilities down the line.
As you continue with the setup process, remember that each feature plays a vital role in ensuring efficient operations and smooth communication flow within your emails. With a solid understanding of these tools, you’re well-prepared to explore the next steps in configuring your email effectively.
Email Configuration Using IMAP and SMTP

Configuring your email using IMAP and SMTP is essential for accessing your emails seamlessly across multiple devices. This process enhances convenience while accommodating modern communication needs. It’s vital to note that over 60% of users prefer IMAP over POP3, primarily due to IMAP’s multi-device accessibility, allowing management of emails whether you’re on your phone, tablet, or computer.
To begin, make sure you have the necessary server details at hand, including the server name, port numbers, and your login credentials. Here’s a quick table outlining the settings you’ll need:
| Setting | IMAP | SMTP |
|---|---|---|
| Server Name | imap.yourdomain.com | smtp.yourdomain.com |
| Port | 993 (SSL) / 143 (Non-SSL) | 465 (SSL) / 587 (TLS) |
| Username | Your full email address | Your full email address |
| Password | Your email password | Your email password |
Now, let’s move on to the actual steps required for configuration.
Step-by-Step Configuration
First up is setting up your incoming mail through IMAP. Open your desired email client, let’s say Apple Mail for this example. Within Apple Mail, navigate to ‘Account Settings’ and select ‘Add new account’. Enter your full email address and choose the IMAP option. Inputting the server name along with the respective port number is crucial; for SSL security, you’ll typically use port 993.
Make sure to double-check your login details before moving on, accuracy here will save you from facing frustrating authentication errors later.
Once you’ve completed this first step, you can proceed to set up your outgoing mail settings.
For outgoing mail configuration via SMTP, configure the SMTP settings using the same server name as mentioned in your table above and input the related port details, port 465 for SSL or 587 for TLS. Ensure you enable authentication by inputting your full email address once again along with your password.
By properly following these setups for both incoming and outgoing mail, you’ll maximize the efficiency of your HostGator email experience. Regular updates and checks on these settings can help maintain smooth communication while granting you peace of mind regarding accessibility and security.
This method of email configuration empowers you with effective tools to ensure that issues like “unable to verify account name or password” become a concern of the past.
Having established a strong foundation in email setup, we can now shift our focus to explore essential features that enhance usability and productivity in your webmail experience.
Webmail Features and Navigation
HostGator truly simplifies email communication with its webmail interface, designed to provide a seamless experience for users. One standout feature is its user-friendly interface. Picture yourself sitting down at your computer; with just a glance, you can see all your emails listed in an organized fashion. The clarity and simplicity make it easy to locate what you need, whether it’s a recent correspondence or an important attachment. It’s like having a personal organizer right there on your screen!
Furthermore, the ability to access your emails from your mobile device adds a layer of convenience that many users find invaluable.
HostGator’s webmail is optimized for mobile devices, meaning whether you’re waiting in line or commuting, checking your emails becomes a breeze. Imagine you’re out and about and realize you need to respond to an urgent message; you can whip out your phone, log in quickly, and take care of things without missing a beat!
As you navigate through HostGator’s webmail, storage and quota management features play an essential role in ensuring smooth operation.
Keeping track of how much email space you have left is crucial. HostGator allows users to easily monitor their storage usage. You’ll be alerted if you’re approaching your limits, helping prevent any surprises like bounced emails due to exceeded quotas. This feature empowers you to manage your inbox proactively by identifying older emails to archive or delete, keeping everything neat and tidy.
Navigating Webmail
Now that we’ve highlighted the key features of HostGator’s webmail, let’s explore how to effectively navigate this powerful tool.
To start using HostGator’s webmail, simply log in by visiting yourdomain.com/webmail through your browser. Entering your email credentials is straightforward, enter your username and password and hit enter! In an instant, you’re taken straight into your inbox where the magic happens.
Once inside, managing your inbox efficiently is essential for staying organized.
Inbox management on HostGator webmail is quite user-friendly. You can create folders to categorize emails, a great way to keep work emails separate from personal ones. Simply drag and drop emails into respective folders or sort them using the comprehensive search function. Ever waste time scrolling through countless emails? With this feature, you can find specific messages quickly based on keywords or senders, making communication more efficient!
When it’s time to reach out via email, composing new messages is just as effortless.
To create a new email, look for the ‘Compose’ button, it’s prominently displayed for easy access. Click it, and voila! A new window pops up where you can enter recipients’ addresses, subject lines, and attach files seamlessly. Thanks to intuitive formatting tools at your disposal, whether you’re drafting a formal letter or a casual note to friends, customizing the text becomes hassle-free.
Understanding features like DuoCircle’s email forwarding, along with essential email security protocols such as DKIM, DMARC, and SPF, will significantly enhance your email experience. These tools not only streamline the management of multiple email accounts but also ensure your communications are secure and authenticated, allowing you to handle tasks efficiently and with confidence.
Managing Multiple Email Addresses
If your business requires multiple email addresses for different departments or employees, HostGator makes it incredibly simple to manage them. You can create distinct email accounts tailored to each member of your team, fostering a professional environment while ensuring everyone stays connected. This setup not only enhances organization but also leaves a lasting impression on clients who appreciate the attention to detail.

Creating New Email Addresses
To get started, first, access the cPanel, where you will find the ‘Email Accounts’ section prominently displayed. This is your control center for managing all aspects of your email accounts.
Once there, click on the ‘Create’ button, which will guide you through the process of adding a new account. Here, you’ll need to enter several important details: choose a unique email name that reflects either the individual’s role or the department they represent, select the correct domain from the dropdown menu, and set a strong password. The whole process is user-friendly and only takes a few moments.
Keeping consistent naming conventions across email addresses is advisable. For example, using formats like firstname.lastname@yourdomain.com makes it easier for clients to remember and recognize your staff members.
After setting up these accounts, it’s crucial to understand how to manage incoming communications effectively.
Forwarding and Autoresponders
One of the practical features available through HostGator is email forwarding. By setting up forwarders, you can redirect incoming emails from one address to another, making it exceptionally easy to manage departmental inquiries without juggling multiple inboxes. For instance, if a customer sends an inquiry to your sales team at sales@yourdomain.com, forwarding those messages directly to an individual’s email could streamline response times and improve customer service.
Another useful feature is auto-responders. These are particularly handy for situations such as out-of-office replies, think about how many times you’ve received an automatic notification detailing when someone will be back, allowing you to tailor your follow-up accordingly. Configuring auto-responders is straightforward; simply define the parameters, like how long you will be unavailable and what message should be sent during that period, and enable it to keep communication flowing even in your absence.
Mastering these essential tools not only simplifies operations but also boosts your team’s responsiveness, preparing you for enhanced security measures and regular maintenance of your email setup.
Enhancing Security and Regular Maintenance

Security plays an enormous role in ensuring your email remains safe and your communications private. With cyber threats lurking around every virtual corner, taking proactive steps to safeguard your email is crucial. Implementing robust security measures not only prevents unauthorized access but also helps maintain the integrity of your information. Let’s break down some straightforward yet powerful strategies that you can adopt.
One of the simplest yet most effective methods is to use strong passwords. Opt for unique passwords for each account, this means no more “password123.” A good mix of letters, numbers, and symbols will vastly improve your security. You might even consider using a password manager to help generate and store complex passwords securely.
Closely related is the importance of enabling Two-Factor Authentication (2FA). This additional layer of protection requires not just your password but also a second form of verification, like a code sent to your phone or generated by an app. It’s like having a deadbolt on your front door; even if someone gets through the keypad lock, they still need that second key.
Beyond these foundational practices, it’s wise to regularly update your passwords. Setting a calendar reminder every few months can help reinforce this habit. Though it may seem cumbersome, many data breaches have been traced back to unchanged or weak passwords; changing them periodically helps keep potential threats at bay.
Another critical aspect often overlooked is managing spam emails effectively. Utilizing HostGator’s SpamAssassin can significantly reduce unwanted emails cluttering your inbox. By filtering out spam before it reaches you, it minimizes distractions and reduces the risk of phishing attacks embedded within those dubious emails.
Finally, let’s talk about backing up your emails regularly. Depending solely on any one service can be risky; after all, our digital world is not infallible. Using HostGator’s backup options helps protect against data loss due to unforeseen circumstances like accidental deletions or system failures. It’s akin to having insurance, by regularly backing up your emails, you’re safeguarding valuable communication history and important documents.
Taking these steps may seem elementary at first glance, but they lay the groundwork for a secure email experience. As you implement these security practices, it’s essential to be aware of potential issues that may arise in your setup process. Understanding common obstacles will prepare you for seamless communication moving forward.
Troubleshooting Common Issues
Let’s get into the nitty-gritty of some common problems that may arise while using HostGator email on Apple devices, along with effective strategies to resolve them. Whether you’re a tech whiz or a casual user, these tips can make the process smoother.

Common Problems and Solutions
One frequent hurdle users encounter is login issues. If you’re having trouble logging in, first check your credentials to ensure there are no typos. Remember, passwords are case-sensitive, so be mindful of uppercase letters. If you’re still having difficulty, consider resetting your password through the HostGator portal. This simple reset can often clear up stubborn login barriers.
Once you’re through that door, though, the next bump on this road might be finding that emails are just not sending or receiving at all.
It’s vital to verify your IMAP and SMTP settings, they’re the foundation of your email functionality. Make sure they’re correctly configured as per HostGator’s guidelines. Also, check your internet connection; a stable connection is essential for seamless email communication. Sometimes it’s as simple as disconnecting and reconnecting your network.
But what happens when you check your inbox only to find important emails have taken an unexpected detour into the spam folder?
If emails are going to spam, first examine your spam filters and ensure that your email address isn’t blacklisted. Send test emails to yourself from different accounts or use online tools designed to check blacklists. Staying proactive here will help maintain email integrity and communication flow.
Another common hiccup could be related to storage quotas.
When you’ve exceeded your storage limits, emails may simply stop coming in. To manage storage effectively, periodically delete unnecessary emails or attachments that take up space. If you consistently find yourself running low on space, consider upgrading your plan for additional storage.
And remember: if these strategies don’t work after several attempts, don’t hesitate to explore HostGator’s extensive help documentation or connect directly with their customer support team. They’re well-equipped to help you resolve even the trickiest technical snags.
By mastering these essential troubleshooting tactics, you’ll not only save time but also reduce frustration as you enjoy the full capabilities of your HostGator email account!
Navigating these common challenges can significantly enhance your experience. With the right approach and resources, you’ll ensure smooth communication through your HostGator email.
Topics
General Manager
General Manager at DuoCircle. Product strategy and commercial lead across the email security portfolio.
Secure your email infrastructure
Protect, authenticate, and deliver. Contact our team to find the right solution.